Best Yogurt Maker for Beginners (with Real-World Experience)

/
Updated:
Homemade yogurt made with yogurt maker

Dipping your toes into the world of yogurt making, especially when you have never cultured a dairy product before, is a bit scary.

When I was planning to make my first batch, I distinctly remember how concerned I was that I wouldn’t hit the correct temperatures at the right time. What would happen? Would I spoil the whole batch? Would I inadvertently give my entire family food poisoning?

These are the questions that every beginner who is venturing into this method of food preparation has. Thank Goodness tools like yogurt makers and incubators can take the guesswork out of your yogurt-making and deliver consistent results.

There are very few actual yogurt makers available. The best yogurt makers for beginners are incubators. One might not be universally better than all others, but a starter good yogurt maker will be inexpensive and use only a little electricity. It should consistently keep the correct temperature. A feature that’s nice to have but not necessary might include a timer and auto shut-off.

I know there are a billion other ways to ripen yogurt, from putting hot water in a cooler to using the proof cycle or light in your oven. I’m not here to debate these methods, though I will tell you that heating cooler plastic isn’t a great idea.

My First Yogurt Maker

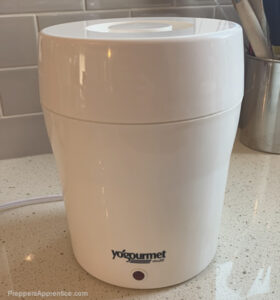
My very first yogurt maker was a Yogourmet, and I feel that it was an excellent yogurt maker for me as a beginner. I still have it because I found it to be useful for some cheesemaking applications. Though it’s not available anymore, I have seen the odd one on eBay and Amazon.

What’s unique about the Yogurmet yogurt maker is that it uses a small amount of water to keep the heat even and consistent. It turned out to be incredibly reliable. Though it has been many years since I’ve used it as an actual yogurt maker, I wouldn’t complain if I had to rely on it again. It never made a bad batch of yogurt.

Besides being a lovely technique for yogurt incubating, I liked the 2-quart container that came with it. I even invested in a second container, and I still use both for yogurt storage to this day. They are very durable and dishwasher-safe. And I’ve dropped them on the hard kitchen tile floor several times, and they haven’t broken.

I hope Yogourmet puts these back in production because they are simple, hardy, and reliable yogurt makers.

Best No-Power Yogurt Incubator

The Culture Cupboard Yogurt Maker has been in regular use as my bare-bones yogurt maker. I’ve been using it for the last two months, mainly because I’m working on using as little power as possible during the summer.
What I like about it compared to other yogurt makers is that it takes up almost no space. There are no cords to mess with, and they can be used anywhere. I didn’t think it would hold heat for the whole eight hours of incubation time that I like to put my yogurt through. When I tested the temperature at the end of the ripening window, I was happy with how little the temperature had fallen and how firm my yogurt was. I only suggest placing a towel on top of the lid to help minimize heat loss.

I also like its design. Most 1-quart canning jars will work with this thermos-style yogurt maker, which makes it very economical.

Available at Amazon.

Best Low-Power Yogurt Maker for Off-Grid Use

The Euro Cuisine YM100 is an all-around dependable yogurt maker with the added benefit of having the lowest wattage of all the beginner yogurt makers listed today. Since it takes only 13 watts to power, this is an ideal yogurt maker for those on a tight off-grid power budget.

Part of the reason its energy consumption is so tiny is the seven separate yogurt jars. There is more surface area to transfer heat through, so the unit produces less heat overall.

It’s an excellent incubator for the beginner yogurt maker because it incubates the yogurt directly into seven 6-ounce glass jars, or enough for one person for a week. Extra jars are available if you want to make multiple batches over a week. If you have a family of four, you can cook up a batch one day, another batch the second day, and have enough yogurt on hand to last two more days.

Available at Amazon and Lehman’s.

Best All-Around Yogurt Maker for Beginners

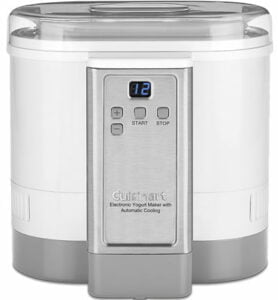
The Cuisinart Electric Yogurt Maker is one of my all-time favorite yogurt makers. I’m not sure if it’s in production anymore, but it really should be. It’s one of the very few yogurt makers that actually cools off your homemade yogurt after its incubation cycle is complete. It was a helpful tool back when our lives were hectic because all I had to do was heat the milk, cool it, and inoculate it. The Cuisinart yogurt maker handled the cooking and cooling, and we had fresh yogurt for breakfast every morning.

I gave this yogurt maker to my aunt, as I have other methods. I should have kept it as that cooling feature alone made the Cuisinart yogurt maker one of the best electric yogurt makers on the market. Also, I could have used something other than a stock image.

The only downside I experienced was that the tabs on either side broke off when I dropped the container. Pulling the container out of the yogurt maker was a little challenging but certainly not impossible.

The Cuisinart yogurt maker can make 50oz of yogurt at a time. You can set the number of hours you want it to incubate, and it will automatically cool when the incubation cycle completes. According to the manual, this electric yogurt maker uses approximately 60 watts to run. This is a moderate load for a small appliance. Even so, it isn’t the worst draw if you’re running on a stable off-grid electrical system, but you will want to calculate its usage.

[UPDATE: It’s definitely not in production anymore, but I found quite a few on eBay.]

Best All-In-One Yogurt Maker

I’ve worked my way through all of my yogurt makers but saved the best for last. Believe it or not, my most trusted yogurt maker is my Instant Pot. It’s not just my current yogurt maker but an all-purpose cooking tool. And it’s not just for yogurt. I boil eggs in it. I can whip up the best chicken soup from scratch in less than an hour. I make at least two dinners a week in it. I make perfect rice in it all the time.

Let’s talk about how an Instant Pot would be a perfect yogurt maker for beginners. I might be a big fan, but I want to discuss how I use it and why I like it best.

It can heat the milk to the high temperature required to denature some of the milk proteins. A separate microwave, range, or cooktop is not needed to make yogurt from scratch. Cool beans.

After the milk is heated, cooled, and inoculated, it becomes an ideal incubator. Use it to incubate for however long you like. After the yogurt sets, you can pour it into another container. Or, use the pot with an air-tight accessory lid, and throw it in the fridge.

Instant Pots are more expensive than the other beginner-appropriate yogurt makers I’ve listed, but it is a worthwhile investment.

One downside is that Instant Pots are much, much more power-hungry. The 6-quart Instant Pot Duo is rated at 1000 watts, but I highly doubt that it would draw anywhere near that much while heating to incubate. It’s feasible to draw more electricity when heating the milk to its highest temperature, but that doesn’t take that long. It isn’t suitable for many off-grid situations but still takes less energy than your average stovetop. There are smaller Instant Pots that use less electricity.

I would also like to note that I make a gallon of yogurt at a time, as you can see from the picture. Instant Pots are widely available. You can also see that I have an extra insert and a slow-cooker lid. I like to take the pot and put it directly in the fridge, but that isn’t necessary. You can look at this model at Amazon and look at the bottom of this post for links to the accessories I use.

Yogurt Makers for Beginners – The Last Word

I’ve given you a history of the yogurt makers I’ve used over the years. Learning safe techniques is far more critical than which yogurt maker would work best. There are many ways to incubate yogurt at home without spending any extra money. I prefer the consistency of a yogurt incubator, and I know that any beginner would benefit from one.

Previous
Next

Using Silica Gel for Food Storage: Is it Safe?

/
Updated:

We are halfway through summer, and my wife and I are bulking up our dehydrated food supply. One of our recent discussions was whether silica gel would be worth including in our dehydrated fruit packs. Sometimes we can’t get all the moisture out of our produce. (I’m looking at you, blueberries!) We wanted to know if including silica gel packets would harm our food or us.

Silica gel is food safe. Food-grade silica gel desiccants are safe to use to remove moisture from food. Silica gel will not change or permeate the food it’s packed with. It is unregulated in most countries as silica gel is inert and not toxic. In the US, the FDA recognizes that it is safe to use and does not require approval for use with food in amounts of less than 2% when added directly to food.

When I was looking into the safety of silica gel products, I found more than a few blogs claiming that silica gel is harmful. That’s not at all what the science says, and I’m happy to say that we’re confidently using it to keep our dehydrated foods mold-free.

What is silica gel?

Simply put, silica gel is a man-made form of silicon dioxide. Silicon dioxide itself is naturally occurring and can be found everywhere. Many vegetables contain it. It’s the main component of sand, quartz, obsidian, opals, and even seashells. Some speculate that silicon dioxide makes up as much as 12% of the planet’s surface. It’s very stable and is not flammable. It reacts with other chemicals, but those chemicals are rarely used outside of chemical or manufacturing plants.

In commercial forms, silica has many uses. Popular toothpaste brands use hydrated silica gel as an abrasive gel that can scrub plaque and stains off your teeth.

The type of silica gel we use to keep packaged food dry is not quite the same, even though it is the same molecule. It’s a dehydrated version and loves to bond with water, which is why it works so well as a help to control moisture.  In its bead form, it binds water molecules to its surface, sucking the molecules out of the surrounding air. The beads hold the water molecules indefinitely or until the pellets are heated up enough to release the water. They can hold up to about 40% of their weight in water before they need to be dehydrated again.

Dehydrated silica gels in non-bead forms are used in food, makeup, shoe soles, paint, adhesives, and tires.

Are Silica Gel Desiccants Dangerous?

As I said above, silica gel desiccants are not harmful. Other forms of silicon dioxide, specifically ones that contain crystalized versions, can cause a variety of lung problems. Silica gel doesn’t cause the same issues because it doesn’t break down the same way. The amount of dust exposure needed to cause problems is exponentially higher than what you would experience with a lifetime of packing jars and food packs with packets. Even if a high exposure did occur,  your body could purge dust from silica gel, where crystallized silica sticks in your lungs forever.

Does Silica Gel Cause Cancer?

The short answer is likely not.

But to my dismay, I read on multiple blogs that silica gel causes lung damage and is a cancer-causing carcinogenic. Maybe you have seen those sites, too.

Most of these errors were made because silica gel and silica are not the same things, though they are both made of silicon dioxide. It’s an easy mistake to make, but it’s still a mistake.

Silica usually refers to a form of silicon dioxide that occurs in nature, is crystalized and not porous. It can easily break apart and turn into dust.

Silica gel is usually man-made, is not crystallized, and is very porous. It’s the porousness that gives it the water-binding property, or its adsorptivity.  It does not easily break apart into smaller pieces.

Silica in dust form does indeed cause a host of illnesses and conditions usually to do with lungs, including silicosis and lung cancer. Repeatedly breathing in crystallized silicon dioxide is very much a health concern.

Silica gel, which is what we use as a desiccant, has been studied to the point where it’s as conclusive as it can get. The conclusion is that silica gel is harmless, nontoxic, and not at all cancer-causing.

Color-indicating silica gels, however, are a different story. Read the next section to learn why.

Are Color Indicating Silica Gels Toxic?

Some silica gels have chemicals added that will change color when exposed to moisture. The two that I’m aware of are blue and orange. When blue indicating silica gel is exposed to a certain amount of moisture, the bead color changes to pink. Orange indicating silica beads also change color when exposed to moisture, but instead change to green.

In 1998, the European Union outlawed Blue Indicating Silica Gel from being sold in Europe. The reason? The blue coloring comes from cobalt chloride, which is toxic in high doses. Cobalt chloride is also linked to cancer.

Orange indicating silica gel is marketed by some manufacturers as nontoxic and, therefore, food-safe, but my research did not verify that. In fact, a reputable distributor says orange indicating silica gels should not be used with products intended for consumption.

I want to be clear: I am no scientist. I don’t know how much Methyl Violet can be ingested and still considered to be safe. However, I know for sure that white silica gel marked as pharmaceutical-grade is widely available, so I will stick with that.

Is It Safe to Put Silica Gel with Food?

Using desiccant packets alongside food is perfectly safe and even makes your dehydrated, vacuum-sealed food stay a little fresher. I would even argue that silica gel makes your home-packaged foods safer. They ward off mold development and other food spoilage by removing the moisture that your drying couldn’t. By placing a silica gel packet in with some dried and stabilized fruit, any extra moisture released will be bound to the porous surface of the beads.

If you live in a humid climate, throwing a packet into a jar of repacked dried goods isn’t a bad idea, either. Just remember that the more air the gel is exposed to, the more likely it will pick up and bind more water.

But what happens if the silica gel pellets accidentally touch your food directly for an extended period of time? There isn’t any reason to throw out your food, as the food industry uses its powdered form as a food additive.

My understanding is that powered silica gel is similar to the beads we use as a desiccant but on a much smaller scale. As I mentioned earlier, the FDA doesn’t regulate its use in food in amounts of less than 2% of the total ingredients.

Here are two of the most common ways it’s used in food:

  1. Anti-Caking Agent – These agents are used to keep powders flowing freely. Those that live in a hot, humid climate know that putting rice in a salt shaker does the same thing. A quick search through my own cupboard revealed that my hot chocolate mix, chili powder, chipotle chili powder, and smoked paprika all contained it. Check out the ingredient label of McCormick’s chili powder here.
  2. Defoaming agent – According to Craft Beer & Brewing Magazine, beer makers use silica gel to bind to proteins and peptides that make beer cloudy. But, unlike other uses in food, brewmasters filter it and the unwanted byproducts out.

There is an ongoing discussion in many of the world’s food regulatory agencies over whether nano-particles used in food manufacturing may be harmful. That question has not yet been answered, as far as I can tell. More studies followed by appropriate regulation are always welcome, but the current body of science says it’s okay. Considering how many products use it, there would be a growing body of evidence if it were a health issue.

What would happen if you ate silica gel?

You would live to see another day! Your body, especially your digestive tract, is full of moisture. Theoretically, if you at a bunch, you could trigger constipation, but eating that amount would be difficult and practically impossible to do by accident. It would be more likely to give you a bit of stomach upset. I don’t recommend trying.

The most dangerous part is the packet. There is a concern that kids or pets might choke on the packs, which is why they all are printed with ‘Do Not Eat’ warnings. The Illinois Poison Center says that it’s nontoxic. They recommend that a child or pet that swallows a packet and isn’t choking to drink some water.

Previous
Next

The Bug Out Roll: Should it Replace Your Bug Out Bag?

/
Updated:
A Packed Bugout Bag

If I’ve learned anything, it’s that time is the most precious commodity in an emergency situation. A bug-out roll can mean the difference between getting out of a nasty situation and getting caught in one. As I’ve learned through the years, emergencies wait for no one. Preparation is key. Part of being prepared is being organized; a bug out roll is nothing if it isn’t organized.

A bug out roll is a bug out bag that uses modular compartments to organize your survival gear neatly. It is made with durable materials that can theoretically withstand punctures from sharp objects, is flame resistant, and won’t crack in sub-zero temperatures.

The bug out roll was developed and is sold by a company called Canadian Preparedness. The company touts that it has been developed by a prepper with longevity and durability in mind. You can see their full selection here.

The differences between a bug out bag and a bug out roll

I am new to the concept of bugging out even though I’m not new to preparing for emergencies.

On a high level, I’ve learned that a bug out bag is similar to the emergency bag I leave near my front door. I keep one loaded with insurance documents, clothes, and other essential items in the event our home is suddenly unsafe.

A closer look shows that a bug out bag is packed with enough gear to survive for 72 hours or while evacuating your home to a safer place. The term “bug out” is borrowed from military jargon, where it essentially means to leave an area immediately without looking back.

A bug out roll is similar to the travel organizer found in your suitcase, but much higher quality and with more thought put into it. From what I can tell, it won’t necessarily replace your bug-out bag, but it will definitely pack well alongside one.

The bug out roll’s creator says that it’s designed for use primarily at your basecamp since most of your time will be spent there.

Materials and variations

The bug out roll comes in three main styles—the Original Bug out Roll, the Lite, and the PackRoll.

The original and lite versions use durable fabrics made by Cordura. These fabrics are extremely tough and can handle a lot of wear and tear. Lighter weight Cordura with a rubberized layer is used in some variations for extra water resistance.

The PackRoll is made from a different material called TearMaster, but I can’t find any manufacturer information. The description given by Canadian Preparedness is that it’s a PVC material used in dry bags that contains a RipStop layer to stop any punctures from ripping.

All versions of the bug out roll include the use of thick, clear vinyl for the pockets. It’s not cheap vinyl that ages quickly, but the 30 gauge heavy-duty stuff they use as boat windows. This type of vinyl is rated for temperature extremes and is far more puncture resistant than most other types of vinyl or clear plastic.

Other components include heavy-duty zippers, rubberized handles, and high-quality, quick-release buckles and straps.

The Original and Lite bug out rolls have panels that will give you more storage. These panels attach with a thick piece of Velcro. I think this would come in handy when you want to unload some of your stuff at your basecamp or leave it in specific areas like the food prep area.

Original style:

  • has extra material that wraps around the sides and buckles to the front
  • durable fabrics made by Cordura
  • has one full-width pocket, four half-width pockets, and three third-width pockets
  • Comes with two removable mod panels, one with three vinyl pockets and one with two Cordura pockets
  • extra mods, or panels, available

Lite style:

  • does not have a roll flap, which leaves the ends exposed but makes for a lighter bag
  • durable fabrics made by Cordura
  • has two full-width pockets, four half-width pockets, and three third-width pockets
  • Comes with one removable mod panel with one full-width pocket and two half-width pockets
  • all pockets are vinyl
  • extra mods available
  • available in several colors

Packroll style:

  • has extra material that wraps around the sides and buckles to the front
  • No additional panels, not modular, and extra mods won’t work with them
  • tear-resistant fabrics and are more water resistant

What can I put in my bug out roll?

I noticed that some of the pockets are smaller than I expected, but these pockets expand. After seeing many YouTube preppers loading up their rolls with tiny camping stoves, water filters, bottles, and more, I’m satisfied that the pocket sizes are acceptable. Everything you need to carry out, from camping stoves to water filters, will fit into a bug out roll. Some pockets are big enough to hold a regular-sized hatchet with room for more items. Concerning yourself with the total weight of your loaded bag is more important than what can go in it.

Best uses

Get Home Bag: In the comments of one video, someone suggested that this could be used as a “get home” bag for college students, but after some thought, I realized anyone could have one in their vehicle or at the office. Prepack with enough supplies to get you home on foot in the event of a civil breakdown.

Vehicle or Motorbike Bug Out Bag: This one actually makes the most sense to me, as the weight of the bug out roll when packed is less of a concern.

Medical/Trauma/First Aid Kit: Using the bug out roll as a medical kit might be overkill for most, but it can be the ideal solution for many. People who would benefit from the roll this way could be large families or groups, first responders, those who live in high-risk disaster zones, or those who want a well-stocked home first aid kit.

Camping: The bug out roll is best used as the hub at your basecamp. Unroll and hang it up, and now you can see your flint striker that might otherwise be lost in the bottom of a regular bug out bag, had you chosen it.

Whether we’re camping or practicing our survival skills, a bug out roll is best used at basecamp. This is where most of your stuff needs to be accessed. Cooking, hygiene, building fires and shelters, and entertaining are more readily completed with items that can be packed in.

Foraging/Hunting/Fishing Trips: Especially in combination with vehicle camping. Pack basecamp-only stuff in the removable bottom panels to leave behind to take the rest of the roll with ammo, bait, emergency supplies, and other tools. Don’t forget the snacks.

Bugging Out on Foot: This is not ideal for bugging out on foot, but packed lightly, it could easily be used as such. The roll itself is not designed for lightweight backpacking. I imagine the decision to create a hardy and durable product was necessary. It could easily be used in tandem with a regular bag.

Drawbacks

Bug Out Rolls are expensive. Keep in mind that these are incredibly high-quality bags that are built to last. Keeping the production in Canada is also more costly, but I like that they are trying to create jobs and help the local economy.

Bug out rolls do not have shoulder straps. Finding a comfortable way to strap them to you or strapping them to another bag would be necessary if any real amount of hiking needs to be done.

Concerned about your noise footprint? The big strips of Velcro used to fasten the modular sections create a lot of noise when removed. This isn’t a problem unless you’re hunting or trying to avoid detection and, for some reason, need to pull a panel off.

They are not waterproof, but some are water-resistant. Some of the Original and Lite versions use a PVC-backed Cordura to make it repel water. The PackRoll versions use waterproof material, but the seams are not waterproof.

Similar products

If you want a DIY version, you could use a roll-up makeup bag or travel organizer like this one. They cost a lot less, but they’re also made of inferior materials. Using a tool roll as a bug out roll is an option, but there is a risk of losing items out of open pockets.

I also found this Emergency Medic Roll, which appears to be a little closer in function but smaller.

Featured/Top Image of the Bug Out Roll credited to u/deleted @ reddit.com

Previous
Next

Making your own yogurt at home: How safe is it?

/
Updated:
A bowl of homemade yogurt.

I’ve been making yogurt at home safely for many years. The first time I made my own fresh yogurt was an awakening. It was my first real attempt at processing my own food beyond regular cooking and baking. The experience was life-changing and lit the spark that became my journey of self-sufficiency. I was yogurt-woke. Since I also had heaps of experience with food safety, I knew yogurt would require a little extra attention to food safety.

If proper food handling and safety methods are followed, yogurt can be made safely at home without fear of foodborne illness taking over the product.

Turning milk into yogurt is an excellent way to extend the shelf life of milk by a week or two and is a safe dairy choice for those of us who are lactose intolerant.

Why It’s Safe to Make Your Own Yogurt

First, let’s talk about how the process works, and, with safety procedures, takes milk and turns it all into yogurt.

Lactobacillus is the name for a group of bacteria that convert sugars, or lactose, into lactic acid. This process is called fermentation. These helpful bacteria strains help us preserve more foods than just yogurt. We also use them in the fermentation and preservation of fruits and vegetables, such as sauerkraut and pickles.

In yogurt fermentation, we remove the bacteria profile naturally found in milk and replace it with our own. We do this using a starter culture, which, under the right conditions, encourages our good bacteria to ferment the milk sugars.

Assuming all safety precautions are taken, the yogurt will stay safe because as lactic bacteria cultures grow, the acidity level of the milk rises. This creates an unwelcoming environment for other bacteria.

Cleaning and Preparation

Ensuring your work area is clean is the most crucial factor in safely making yogurt. If your kitchen is dirty, it’s likely contaminated with bacteria waiting to compete for whatever food they can, and your milk is an easy target.

Take the time to clean off your countertops and scrub them down. Scrub your sinks and sanitize your sponges, too, as some of the most harmful bacteria will lurk there.

As far as actual cooking hardware is concerned, as long as they have been washed recently in hot, soapy water or in the dishwasher, they’re probably fine. If it makes you feel safer, run your equipment through the sanitize cycle in your dishwasher or through a bowl full of water and bleach, but it’s not necessary.

Make Sure Your Milk is Safe

Don’t overlook your milk. The best type of milk to use is full fat pasteurized milk, for reasons of safety and quality. Skim or part-skim milk won’t thicken up like low-fat varieties of commercial yogurt, as they won’t have the same thickening additives commercial versions use.

Though technically the safest milk is ultra-pasteurized milk, the process can cook the proteins necessary for fermentation. Some brands of UHT milk may work better than others.

Raw milk, or straight out of the cow (or another animal), can carry loads of harmful bacteria. Microbes like campylobacter, salmonella, and E. coli love raw milk. These types of bacteria are harmful to some people, especially pregnant women and the elderly. This is why the FDA is against drinking it and why many states have banned its sale entirely. Coming down with a case of food poisoning from raw milk is rare, but we’re talking about safety here.

You CAN still use raw milk to make yogurt, but you will need to make sure to heat it to the proper temperature. Lucky for us, the temperature required to denature specific proteins in the milk properly is higher than the temperature the milk needs to get to kill off all the bad bugs.

Lastly, don’t use milk that’s close to the end of its life. If the milk was left out or is past its expiry date, it shouldn’t be used, regardless of how good it still looks. Spoilage may already have started, and that can interfere with the fermentation. No level of good bacteria can undo spoilage.

Heating Milk to the Correct Temperature

There are a few reasons why we want to heat milk to a specific temperature before introducing a yogurt starter, but since we’re talking about safety, we will focus on that.

Heating milk is a necessary step in yogurt making. This step can be skipped if you have an unopened supply of UHT milk.  This step should not be ignored for all other types of milk, whether it is raw or pasteurized.

Milk does not need to be boiled to kill off any existing bacteria, which is good because boiling milk does not make good yogurt. According to this OSU leaflet, heating milk to 165°F (74°C) for at least 15 seconds is enough to pasteurize your milk.

Since yogurt making requires you to denature the whey proteins by heating it up in a range of 180°F to 200°F (82.2°C to 93.3°C), pasteurization doesn’t need to be an extra step.

I’ve run across many suggestions that you don’t need to heat your milk up to that high a temperature to make yogurt. I’m sure the results from not heating milk still produce yogurt, but it is unsafe. Contamination can occur at any step, and this is the best safeguard in the process.

Using a Safe Yogurt Starter

There are three ways to culture your yogurt. You can buy a commercially prepared starter that has multiple bacterial strains. It can be cultured from store-bought yogurt. Or, you can use your own yogurt from a previous batch.

All three of these methods are relatively safe, though some are obviously safer than others.

A commercially prepared culture is the safest because the bacterial strains are produced and packaged under strict standards.

A container of yogurt from the grocery store is also produced under strict standards, there is no real control for what happens to it after it’s opened. Consider how old it is, and if Uncle Henry contaminated it by eating directly from the container.

Making your own starter from a previous batch is a good balance between a commercially prepared yogurt and a commercially prepared starter. It’s economical, and you can package up enough for your next batch the minute the current batch is done. It’s not foolproof, but it is in your control. One downside is that cultures can lose strength after a few batches. Another disadvantage is that the starter should be used within a week.

Related: These yogurt makers are great for beginners.

Cool and Store Appropriately

Mina's bowl of yogurt
My daughter’s bowl of fresh homemade yogurt, complete with frozen wild blueberries.

As soon as the incubation period is done, your finished yogurt is mostly safe from a foreign bacterial invasion. It has become too acidic for most bacteria to gain a foothold in.

But it’s not entirely done. Your yogurt will keep fermenting until it cools completely, and even then, it will continue to ferment in your fridge at a much slower rate. Store your yogurt in a food-safe container with an airtight lid to keep the refrigerator smells out and freshness locked in.

Though the risk of spoilage is low, it still needs to be handled with the same common sense as all dairy products. Use clean utensils to serve from the container. Keep it cold. Don’t leave it out for more than a few minutes before putting it back in the fridge.

And if it looks or smells funny, throw it out.

Conclusion

Overall, just how safe is making yogurt at home? I always use the recommendations I’ve laid out above, and I’ve never contaminated a batch in over 15 years.

For those of us who like to be in control of our food supply, making yogurt is one of the easiest ways to introduce yourself to self-sufficiency at home. It’s also one of the best ways to start teaching yourself about food safety when processing and fermenting at home. The level of safety required is more than average home cooking and food handling but much less than other types of fermentation.

You may read other recommendations to buy bunches of tools. You most likely have everything you need in your kitchen to make yogurt safely at home. You may need to pick up a decent probe-style food thermometer and a dedicated food-safe container just for your yogurt.

And don’t forget to enjoy the fruits of your labor with a little fresh fruit and honey. Or maybe some nuts with maple syrup.

Previous
Next

Why You Should Vacuum Seal Dehydrated Food (With 6 Reasons)

/
Updated:
vacuum sealed dehydrated food

Every spring and summer, I find myself at U-pick farms, farmer’s markets, and even my own garden, stocking up on produce to dehydrate and vacuum seal. I’ve been doing this for years because it saves loads of money; the food is locally grown and picked in season, reducing my carbon footprint.

While dehydrating food itself significantly extends its shelf life, vacuum-sealing dehydrated food will keep its nutrition and flavor for 30 years or longer. It will ultimately depend on the type of food, how it is stored, and how much moisture is in your product.

Food dehydrators and vacuum sealers are already valuable tools in the prepper’s arsenal. Combining the two to achieve better results makes a lot of sense. You can even create and store dehydrated meals for hiking, bugging out, or other emergencies.

6 Reasons to Vacuum Seal Your Dried Foods

It sounds like a lot of extra work for a small gain. After all, drying and dehydrating greatly extends the life of food without any additional help. But there are many benefits to vacuum sealing dehydrated food, even if you don’t let it sit for decades on end.

  1. Better retention of nutrients. Your foods won’t keep all of their vitamins and minerals, but they won’t lose them at the rate that other preservation methods will. Dehydrating stops the initial loss, but vacuum packing ensures they stay put.
  2. Better flavor for longer. The food’s flavor is also locked in. Dehydrated food keeps flavors in check because all you lose is water. Vacuum sealing doesn’t let that flavor out afterward, and foods never taste stale.
  3. Lightweight prepackaged snacks are ready to go. I have a stockpile of single-serve trail mix and jerky waiting if I ever need it. Whether I want to take some on a hike or if I need rations while I move the family quickly in an emergency, we won’t starve.
  4. Takes up less space and stores better. I’ve seen many other people vacuum pack their dried goods in mason jars, and I get it. It’s handy and easy to organize. The problem is that they take up a lot of room, and once a jar is opened, the freshness clock starts ticking. Instead, think about creating a well-organized bin system full of single-use packages.
  5. Keeps foods from going rancid. You know that taste. We all do. Dried foods like nuts and brown rice have healthy fatty acids that can go rancid over time. Vacuum packing these foods stops oxygen from causing rancidity.
  6. Use up your random leftovers. I buy fresh herbs like cilantro and parsley but only use about ¼ of the bunch each time. Now I dry the leaves and separate them into ¼ bunch bags for me to throw in with rice, soups, and casseroles. The same works for other veggies and fruits, too.

Food Safety

Keeping your dehydrated food flavorful and nutritious aren’t the only benefits of vacuum sealing. Vacuum sealing food also prevents moisture and air from getting in. If you’re ever caught in a situation where your basement floods or your bugout bag is dunked in the river, properly sealed food will survive.

Food that isn’t exposed to moisture and oxygen makes it resistant to airborne bacteria that cause food to spoil. It’s simple enough to dry your food to the driest levels. Still, if you are concerned about the amount of moisture left in a sealed bag, food-grade desiccant packs can help remove any leftovers.

Botulism is a real threat, and it doesn’t care about oxygen. Even just a taste of food contaminated with the poison can cause paralysis or even death. It is rare, but it’s why proper food handling is so important.

Botulism works with moisture in environments that lack oxygen. The bacteria and its spores can be killed quite easily. The toxins they create are a little more difficult to kill off, and it’s not recommended that you try, according to the CDC and the National Center for Home Food Preservation.  If you see moisture inside a vacuum-sealed food pack, throw it out.

The rule of thumb is that unless you process your food as if you were canning it, you should expect that your food will contain live spores. This is why we generally store fresh food in the fridge or freezer. If it belongs in the fridge or freezer before vacuum packing, it should still go in the fridge or freezer after vacuum sealing it.

Storing Vacuum Sealed Dehydrated Foods

Exposing food to light, air, heat, and moisture will reduce the quality of your stored foods. Any one of these elements alone will slowly destroy all of those precious vitamins and minerals in your food, if not destroy it entirely.  Vacuum sealing will keep out the air and moisture, but what about the other two?

Light and heat are storage placement problems. The colder and darker your storage area, the longer your food will last. Storing your food in a bin or using Mylar bags will keep light and oxygen under control, but packaging cannot control the temperature.

Keeping food at a temperature of 60F(15C) or colder is ideal. A cool basement, a fridge, and even a freezer are excellent. In my opinion, keeping your carefully packed food in a freezer or fridge is overkill and against the point of this whole exercise.

So what can you do if you don’t have a cold storage place?
Just find the coolest place you can. The shelf life of vacuum-packed dried food stored in warmer temperatures might not last 30 years. However, it will still be considerably longer than dehydrating alone.

What Dehydrated Foods Can I Vacuum Seal?

Dehydrating and Vacuum Sealing Meats

We naturally think of jerky when we think of dehydrated meats, but the list doesn’t end there. I’ve learned that dehydrating and vacuum packing meats and fish can work very well if they have a low-fat content or have the fat removed. I’ve had great luck with drying ground beef and canned chicken. Other meats to try are deli meats, ham, sausages, and canned meats.

Fruits, Vegetables, and Nuts

Just about any vegetable or fruit can be dehydrated and vacuum packed. Exceptions are high-fat foods like avocados because they don’t dehydrate at all.

Some fruits and vegetables require a little extra work before they can go through dehydration, like blanching or a citric acid dip, so take care there.

Most nuts shouldn’t be put in a dehydrator as the combination of heat and air can cause rancidity. Skip the dehydrator and head straight to the vacuum sealer.

Vacuum Sealing Pantry Items

This one is a no-brainer to me, just because I already do it, but isn’t the most conventional. I always buy things in bulk that I don’t use often but need to have on hand. Take popcorn as an example. I buy a big bottle of it at Costco, and that bottle lasts me 5 years. But the popcorn itself doesn’t last that long. By the end of the second year after opening, its kernels pop up very small and aren’t as flavorful.

Vacuum packing pantry items into smaller packages means that they will remain fresh forever. Sticking with the popcorn example, I vacuum-pack a half cup per bag because I know that’s how much I make each time. Other items I store a month’s supply in each pack.

Dried goods to consider stockpiling way include flour, cornmeal, rice, baking ingredients, or even pasta.

Making Your Own Dehydrated Vacuum Packed Meals

This is an area I’m looking forward to exploring, mostly because I like to cook and I like to eat, and when that happens, I’ll be posting my findings. So far, I have learned that some foods just don’t dehydrate well enough to work for backpacking, but many definitely do.

There are two methods for this type of cooking with your dehydrator. Some meals work better when you cook them in advance and dehydrate them after, like chilis and stews. Other meals turn out best if all ingredients are dehydrated separately and combined in their final package, like rice dishes and noodles.

Remember that there are many different types of prepackaged boxed meals on grocery store shelves that could be replicated. Adding products like powdered eggs and dehydrated dairy products, a real meal whiz could create and pack their own macaroni and cheese or boxed scalloped potatoes.

Chef Glenn over at BackPackingChef.com has a wealth of recipes, instructions, and insights into dehydrating and creating backpacker meals.

Previous
Next

How to Store Yeast for the Future (And What To Avoid)

/
Updated:

If 2020 taught me anything, it taught me to appreciate a good stockpile of yeast. I was already a seasoned bread baker before the shutdown and had a well-stocked pantry, but I hopped on the sourdough train because it feels like a good skill to have. Through that, I learned that I prefer to have yeast on-hand, and I started questioning how long it could be stored.

The time that commercial yeasts remain viable depends on how it is stored. Depending on humidity and other factors, if left open on a shelf, yeast will last less than a couple of months. Baker’s yeast stored in an airtight container in a cold freezer will keep yeast viable for years. Contrary to popular belief, yeast does not have a definitive expiry date.

While yeast absolutely will lose some of its potency over time, steps can be taken to slow down that process. I explain how you can keep dry yeast fresh farther on.

How to Make Yeast Last Longer

According to the folks over at StillTasty, active dry yeast kept at temperatures below 0°F (-18°C) will keep indefinitely. I know from my own experiences that this is true. I found yeast that had to have been several years old that was still viable. There is a good chance that if it is stored in an airtight container forgotten in the back of your sub-zero freezer, it’ll be fine to use.

Note: If you store your yeast in the door of a freezer or if the freezer has an auto-defrost feature, your yeast may go stale sooner. Yeast doesn’t do well when forced to deal with regular temperature changes.

Vacuum sealing is my favorite way to store extend the life of yeast, especially if you’re buying big packages but only making bread once a week or less. You can vacuum seal much smaller amounts by sealing into a small bag. Put all of your homemade yeast packets in a Ziploc or appropriate container and throw it in your freezer. It’ll be good forever, assuming it was good going in.

This video explains how to create and seal small bags with a vacuum sealer.

How to Stockpile Yeast

The following rules are made with the assumption that you’re buying your active dry yeast in big packages. Buying in bulk is necessary when building a stockpile, though it may not make much sense for a small family or single person.

The First rule of storing active dry yeast: Keep it airtight.

When a new pack is opened, the contents should immediately be transferred to an airtight container fit for freezing. This can be a glass jar or a freezer-safe plastic container.

The Second Rule: Never store more than 4 months’ worth of yeast in a single open container.

When I open a 2lb brick of yeast, I don’t want to store all of that yeast in a single jar. Every time the jar is opened, the yeast is exposed to light, moisture, and heat, all of which will shorten its lifespan.

Instead, invest in some small jars or save any small yeast jars that you might already have on hand. Baby food jars would also work but are a little more fragile.

The Third Rule: Rotate your stock.

As I listed above, unopened bricks of active dry yeast can sit on a shelf for more than two years and still be considered fresh. By the time I open a brick, it’s usually two or three years old. I don’t want it to get any older than that, because I don’t want to be wasting freezer storage space.

Something I learned at my high-school fast-food job was to rotate your stock, and of course, it follows through to prepping. The older product is pushed to the front. The new product goes to the back. Always keep your stock organized so that you don’t waste time searching for which product is the oldest.

How Much Yeast to Stockpile

The first thing to remember that homemade bread is hardier and more filling than your average loaf of Wonder bread. If your family eats typical commercial white bread, count on using about half as many loaves, as homemade bread tends to be hardier.

To figure out how much yeast you would need for your stockpile, count on using roughly a tablespoon of yeast per loaf. Conveniently, there are about 52 tablespoons of yeast in a pound, so just multiply the number of loaves you think you would go through in a week by the number of years you want to stockpile.

Yeast Stockpile Formula

(Loaves of Bread Consumed per Week) x (Years to Stockpile) = lbs of Yeast to Stockpile

I’m going to use my storage and usage to give you an idea as to what you can expect.

As I said earlier, I make my own bread and have for years.

For prepping purposes, I keep about 3-4 years’ worth of yeast on hand. I’ve been rotating through this stockpile for over ten years. My yeast always fully activates even though it’s a few years old by the time I use it.

We go through about two loaves a week, which is roughly two pounds of yeast per year. This means I usually have two or three unopened 2lb pack of yeast in my stockpile and one open and in use. I keep so much on hand because, in an emergency situation, my family’s bread consumption would likely double as we lose access to more convenient foods. And I’d like to hold off turning the great sourdough experiment of 2020 into reality as long as possible.

It’s Okay to Use Expired Yeast

“But it has an expiration date printed right on it,” you might say.

Sure, there is a date printed on your yeast package, but it’s a best-before date, which is entirely different from an expiration date. Think of a best-before date to be like a manufacturer’s freshness guarantee. An expiry date is not the same. It’s a warning not to consume a product because it will likely spoil soon after that date.

Yeast doesn’t spoil to the point of being uneatable because it doesn’t really expire. That’s not a guarantee yeast will still activate the way it should, but it won’t make anyone sick. Yeast is a living organism. If it dies, it’s harmless.

Tip: If you store your yeast in the freezer, make sure to give it time to warm up before use, or give it extra time to proof before deciding it’s not fresh. Yeast makers like Red Star suggest giving your yeast a full hour to warm up before using.

So, when is yeast bad? When it doesn’t look like yeast. Is it grey? Toss it. Is it clumpy? It’s not fit for consumption.

How Long Will My Yeast Stay Fresh?

Where and How Yeast is StoredHow Long Yeast Will Stay Fresh
Open Package of Yeast at Room TemperatureLess than 2 months
Open Package of Yeast in Refrigerator2-4 Months
Open Package of Yeast in the Freezer6 Months
Sealed Package at Room Temperature2-3 Years
Sealed or Resealed Package In Fridge3 Years
Sealed or Resealed Package In Sub Zero FreezerIndefinitely

Is My Yeast Dead?

I’ve been baking bread on and off for over 15 years, and I’ve never had yeast go completely dead. That is anecdotal, but it’s also been a lot of yeast with sometimes long stints in between uses.

The worst I’ve personally seen is the yeast that has risen bread to three-quarters the height fresh yeast would. That has only happened once.  I’d bought the yeast in a small jar quite long before and forgotten about it. Half of the jar was left, and I used what was left to make hamburger buns and dinner rolls to stock up the freezer.

If you think your yeast is dead, proof it before trying a recipe. Proofing yeast that you haven’t used for a while is a good idea, especially if you like recipes that don’t call for proofing beforehand. Most of today’s yeasts don’t require proofing if they’re fresh, so don’t worry about it if you know your yeast is good.

Red Star Yeast has a well-written yeast freshness test you can follow to proof-test your yeast and instructions on how to add your proofed yeast into a recipe that doesn’t call for proofing.

If Your Yeast Is Dead…

If you find yourself in a situation where you don’t have access to yeast, as many did in the spring of 2020, you can try your hand at creating a sourdough starter. Once you learn how to identify a healthy starter, it’s a relatively painless process. Sourdough-focused blog The Clever Carrot has a wealth of information and recipes, including an easy-to-understand beginner sourdough starter method.

Previous
Next

Storing Water for Emergencies: How Long Can You Safely Store Water?

/
Updated:
A Large Water Bottle on Grass

We all know that drinking enough water every day is critical to our survival, but how do you really know that your stored water is safe to drink? Simple test kits to tell you if your supply is contaminated don’t exist. But, if there were, it would make our prepping efforts much less complicated.

Water can be indefinitely stored if using adequate storage measures. Properly treated tap water poured directly into properly cleaned, food-safe storage containers do not require any rotation or replacement schedule. Water will not go bad if it is not contaminated.

Is it really as simple as pouring your water into a jug and storing it? No. Safely keeping water for the long term means thoroughly sanitizing containers, finding the right storage spot, and ensuring your water source is free of debris and contaminants.

Long-Term Water Storage

We can agree that everyone needs an emergency water supply. We can have discussions about how much water we should have on hand or how much we need to survive, but the storage method should be relatively the same. Pick out a container, pour your clean water in it, seal, and store it in the corner of your basement or garage. It should be just that easy.

But miss one step and your supply may not stay fresh. You might not even notice until you have an actual water emergency when it’s too late to fix the problem. Though there are ways to recover contaminated water, keeping it fresh and safe to drink should be the goal.  Why do all the work to store the water in the first place if you know you will have to treat it again later?

Speaking of fresh, I see a standard recommendation to change or rotate your water supply every six months. It exists not because water magically goes bad after that amount of time but because water stored for a while can take on a stale taste. Over time, tiny bubbles dissipate from the water, making it flat like an open can of soda.

Fortunately, there’s an easy fix for stale-tasting water. If your water tastes stale after storage, pour it from one jug to another to mix air back into it, and it’ll taste just fine. Leaving the cap off for 24 hours can also help the unpleasant taste disappear.

Which containers can store water longer?

All plastic containers that store food or water must meet food safety requirements and never previously used as anything other than a drinking water or soda container. Don’t buy second-hand, unless you can trust the previous owner only used them for water storage.

You can fill thoroughly cleaned soda bottles, but the water might pick up the flavor. It’s perfectly harmless, of course, but it may not be to your taste.

Though I’ve stored water in milk jugs for flushing toilets and general cleaning, milk jugs should not store drinking water. According to FEMA, cleaning does not remove milk proteins and fruit sugars to the degree needed to keep your stored water safe. While I might personally disagree with FEMA on the reasoning, the thin plastic material is cheap and too easy to damage to serve as an adequate long-term solution.

Glass is okay for water storage, but make sure they never previously contained non-food items. Canning lids should be new and never used. Glass is not ideal due to weight and fragility, but it is the least reactive material.

What about metal containers? I don’t recommend using stainless steel containers to store water because the metal reacts with bleach and other chemical sanitizers. If you don’t plan on using bleach, they’re okay. Avoid aluminum containers as they react with many acids. Aluminum containers often have a plastic liner, which might contain a plastic softener called BPA, a known carcinogen that can leach out into the water.

Premade plastic water storage containers are available, ranging in sizes from typical 5-gallon blue water jugs to super-large containers of practically any size. It looks like blue water barrels are the most popular among people who store long term. I prefer containers made of food-grade HDPE plastic, which is very sturdy but still has a little give and can take a bit of abuse.

How do I properly sanitize a container before I store water in it?

Cleaning and sanitization is arguably the most critical step to storing clean, safe water for an extended time. Cleaning and inspection are relatively straightforward, regardless of what kind of container you choose.

Cleaning

To start, wash everything in hot water with dish soap. Thoroughly rinse, and let air dry. Inspect to make sure there are no particles or mineral build-up on the inside of the container. For previously used containers, do not hesitate to throw them out if it doesn’t come clean or if the inside looks damaged.

Sanitizing

There are three ways to sanitize your containers, but some methods aren’t suitable for all types of containers. Choose your approach based on your preference and your container material.

Bleach Method:  This is popular because it’s very cheap and reliable. All you need is a fresh bottle of bleach, a bathtub, and a bowl. There is no need to rinse as long as the proper time is taken to air-dry afterward. This method is not recommended for metal containers, bowls, or sinks, as bleach reacts with most metals.

No-rinse solutions:  This method is more straightforward, but it will cost a little more. Acid sanitizers like Star San are popular with the beer brewing community to sanitize bottles and bottling equipment. Unlike bleach, surfaces only need to come into contact with the diluted product and be allowed to air dry. Best of all, these products are safe to use on all materials except aluminum. However, I do not recommend storing the product in anything but its original container.

Hot Water Method: This method is the most difficult, but it is the cheapest. You don’t actually need to boil your water to sanitize your bottles. However, the water temperature inside your container needs to reach at least 170°F for at least 30 seconds. There are ways to do this, but it becomes much more difficult without submerging your container in a big pot of water. Don’t choose this method for sanitizing single-use plastics like soda bottles.

Does water need to be chlorinated before it’s stored?

If your tap water is already treated and chlorinated, it’s perfectly fine to store as is. Different countries, counties, and even cities have different levels of acceptability. In the US, the EPA sets what standards all jurisdictions must meet. Check your local water authority to determine if your water meets the minimum suggested standards.

If your water comes from an untreated source, like a well, or if you have an artisan spring, filter and treat before storing. You can chlorinate it yourself, but a DIY chemical water treatment isn’t going to remove heavy metals and toxic pollutants.

Where should full water containers be stored?

An old wives’ tale warns against placing plastic containers full of water directly on concrete. There is no merit to this. A local concrete expert I spoke with suggests that the plastic jugs are more likely to break down and contaminate the water than concrete. If the concrete has absorbed gasoline, oil, or another chemical spill, definitely keep the jugs off the concrete. A pallet makes a terrific barrier.

I don’t suggest keeping your water outside, but sometimes that’s the only room you have. If the plan is to place your containers outside, make sure they’re UV resistant. Store the full jugs in a shady spot, and cover with a tarp to keep dust and dirt from building up.

If you live in an area that sees winter temperatures fall below freezing, make sure to leave enough room in the jugs to let the water expand.

Speaking of freezing, I ran across one of the most ingenious ideas for storing water in a freezer.  Placing a layer of one-gallon jugs of water at the bottom of a large chest freezer will help you in two ways. They will raise the usable space for storing food, which will make it easier to reach. The frozen water jugs will also keep your frozen foods cold for longer in the event of a lengthy power outage. Speaking as someone who has lost everything in my fridge and chest freezer to a 5-day power outage, this tip is golden.

The best place will always be a quiet corner in a basement or garage if you have either of those.

Can I Stock Up On Bottled Water Instead?

Stocking your shelves with bottled water is a great way to create an emergency drinking water supply. Since the US regulates bottled water, it is a clean and safe option with none of the work. The downside to buying bottled water is that it comes at a much greater cost.

If you would prefer to buy your water, look into the 5- or 10-gallon bottles from a water delivery service or water refill service at your local grocery store.

Otherwise, you’re probably buying small plastic bottles designed only for one use. The little bottles are wasteful and more susceptible to taking on flavors or aromas from whatever is stored nearby. The only positive attribute of keeping small water bottles is that they are ideal if you need to pack some water when leaving your house in an emergency.

Previous
Next

Battery-Powered Chainsaws: A Better Choice for Preppers

/
Updated:
A battery-powered chainsaw cutting into a tree

Like any other tool or device a prepper might consider, a battery-powered chainsaw deserves a little scrutiny. Due to recent events, I am keen on learning more about drawing as little attention to myself as possible when I start my future homestead. Believe it or not, chainsaws actually fit into this.

Are battery-powered chainsaws any good? With manufacturers taking advantage of new battery technologies, many battery-powered chainsaws perform at the same rate as conventional chainsaws in their class. They have several advantages that everyone from preppers to landscapers will find appealing. They are quieter, require less maintenance, and are often easier to handle.

There’s a big caveat here. If you find yourself in a bugout situation with no transportation, you don’t want to carry a chainsaw out with you. If that’s why you’re here, think about what other survival items you should instead use that weight for.

However, if you have a stash, a bugout vehicle, or already have a homestead or piece of property started, read on to find out how they could benefit you, too.

Why Battery-Powered Chainsaws Are Good For Preppers

Though they do have some drawbacks, I’ve discovered that the type of chainsaw you want entirely depends on your situation. A battery-powered chainsaw would be useless to lumberjacks, I imagine.

But for preppers, there are a lot of reasons why you would turn to them.

They’re Quieter

If you believed half of the internet, you would think that cordless chainsaws were magically silent devices. This isn’t true.

While they do produce less noise than fuel-consuming saws, electric chainsaws still create plenty of noise. They are about as loud as a gas lawnmower, which is much quieter than a gas-powered saw. It is still loud enough that several health agencies recommend using ear protection.

There is another reason why they should be considered quieter.  The only point that the saw actually makes noise is when the trigger switch is pressed. The motor doesn’t need to run if it’s not cutting, so it will immediately stop as soon as you let go of the trigger.

When you have a saw that isn’t as noisy, and it doesn’t make noise unless it has to, it’s better for someone like me. It means that I can create a smaller noise footprint and hopefully draw less attention to myself when I’m in search of firewood.

They Start Every Time

When I’m off-grid, I want something that starts the first time, every time. Pull cords are the bane of my existence, going back to when mowing the lawn was one of my biggest childhood chores. When they’re new, motors started by pull cords might start beautifully, but that fades with time. I don’t have time to sit around and try to figure out how to get something running.

A battery-powered chainsaw starts every time because the motor does not run unless you are actively holding the trigger switch. There isn’t a pull-cord to make you miserable. You aren’t restricted by an extension cord that will only let you go so far.

There are only a power button and a trigger switch, so all you have to do is bring it to where you want to work.

No Fuel = No Pollution

I don’t want to store fuel. Stabilizers must be added to store fuel long term. Then, it needs to be mixed with oil.

Expensive premixes have taken the mystery out of the complicated oil-to-fuel ratios, but they still must be stored.

It’s a messy, stinky situation, and you haven’t even started your saw yet. Inhaling all that exhaust isn’t exactly healthy, either.

These issues don’t exist for chainsaws that run on battery power.

There is no need to stop to refuel with a battery-powered chainsaw while you’re working. It runs until the battery needs charging.

The downside is that you need to charge your battery. Still, if you have other power tools, you may also have a second and third battery ready for use.

Charging the Battery Under Different Circumstances

A battery chainsaw requires electricity. If you are preparing to be in an area or situation without power, there are some simple solutions.

It can be a relatively easy DIY job for those of us that like to do things themselves. Some home-built solutions include a small solar module, an RV battery and case, and a DC battery charger from your chosen tool line to get going. This system won’t power much and isn’t the most stable, but it will charge a few batteries a day.

A quick online search turns up many DIY plans and recommendations. I found this hodgepodge at instructables.com which gives a few different options on how to do this.

Other options for starting out include prebuilt solar/battery systems. However, they tend to have smaller batteries and may be less reliable. For roughly the same price or less, a small gas generator may be a better option.

If you already have a stable power source, such as gridded electrical, your own renewable energy, or a generator, you’re ready to go.

Less Maintenance

There is no real maintenance at all, really—just a few tasks to keep it running in peak condition.

The saw chain needs to be regularly sharpened, tensioned, and protected between uses. Like other styles of chainsaws, battery-powered saws need chain oil, too. Just check the reservoir before each use and top up as required.

As I said earlier, these machines don’t use fuel. Gas-powered saws can have an oil filter, a fuel filter, and an air filter that needs to be checked and replaced regularly. Battery saws have none of these, and therefore no need to maintain or replace them.

Though most manufacturers recommend servicing all tools periodically, there is no need to weatherize a battery saw or measure its spark plugs.

They Can Be Used Indoors

Consider this situation. It’s the first cold snap of the year, and you realize you still have some firewood to cut into logs. You’d prefer to do it someplace warm, like in your garage that’s heated by the woodstove in the corner.

Battery operated chainsaws can work indoors with little or no ventilation. If your chainsaw doesn’t burn fuel, there isn’t any exhaust or strong fumes. And that means you don’t have to worry about carbon monoxide buildup, poisoning, or, uh, dying.

The second reason why they can be used indoors is that they’re quieter than gas versions. I won’t say they’re silent because they’re not, but they don’t have the roar of the gas motors. As I already said, they aren’t really all that quiet, but in a shop or garage, it would be the difference between a little on the loud side and blowing your eardrums out.

Are battery chainsaws as good as gas?

For most people, they will work just as well, if not better than gas.

They let you work smarter, not harder. While a battery-powered chainsaw is going to be about the same weight as a gas saw, the former is more compact, better balanced, and doesn’t vibrate nearly as much. This means that they are more maneuverable than gas and require less arm power from you to get the same job done.

Battery-powered chainsaws tend to be a little cheaper to operate. This is particularly true if you already have invested in batteries for other tools.  Electricity, especially if you generate your own, tends to be cheaper than oil and fuel.

Power is becoming less of an issue with newer high-capacity lithium storage cells. Some cheaper models are not very good for anything beyond trimming trees, but newer models can make short work of cutting up smaller logs for firewood.  Check out this video I found for an example of the Stihl MSA 200. It’s the first of two videos about cutting up about 1/3 of a cord on a single charge.

Are battery-powered chainsaws safer?

There are a few reasons why they might be safer.  They’re balanced very well, which makes them easy to handle. Reaching up to do some limbing isn’t quite as strenuous.

These chainsaws are also safer because if you let go of the trigger for whatever reason, the motor stops automatically. They still have safety mechanisms to brake the chain in certain situations, as all chainsaws do.

Of course, if you don’t have experience with chainsaws, you must learn about chainsaw safety. You need to think about proper protective equipment, including ear, eye, and leg protection, and learn about proper posture and stance for cutting.

This Old House has a great video a lot of great safety tips, and Tractor Supply has an excellent article for beginner chainsaw users.

Conclusion

I originally intended to give a relatively brief and broad overview of whether battery-powered chainsaws were any good. What I found was a style of chainsaw that will meet the day-to-day demands I expect to see in my prepping. I also now know I have a lot more to research and write about.

The only real drawback I found was that battery-powered chainsaws are not as fast as gas and that they weren’t suited for using to cut big logs. But when weighed against the ability to pick up the saw and go, it becomes an almost relaxing experience.

Previous
Next