How to Dry Fresh Pasta in a Dehydrator For Long-term Storage

/
Updated:
Homemade, fresh pasta is easy to dry and store, and tastes better than commercial pasta products

As someone who has always been concerned about food security, I keep a close eye on food prices. Recently, I’ve noticed that the cost of pasta has been going up. This should concern all of us because pasta is such a staple food. It’s versatile, relatively cheap, and has a long shelf life. If the price of pasta continues to go up, it could seriously impact our ability to feed families in a crisis.

One way to prepare for rising food prices is to learn how to dry and store your own pasta. With a dehydrator, you can make your own dry pasta at home, which will last for months or even years. This way, you can be sure that you’ll always have access to this essential food, no matter what happens to the price.

5 Reasons to dehydrate and store your own pasta

Reason 1: Pasta is a cheap and filling staple food

Homemade pasta is cheaper than store-bought pasta, and it is also more satisfying and nutritious.

Pasta made from just flour and eggs has all three macronutrients – carbohydrates, protein, and fats. This makes it a filling and satisfying food that can help keep you going throughout the day.

Reason 2: It can be made in large batches for long-term storage

When you make pasta at home, you can easily make large batches that last for months or years. This is a great way to ensure that you always have access to this essential ingredient, even in times of food scarcity.

Reason 3: Pasta can be stored for long periods without losing nutritional value or taste

As long as it’s kept away from moisture and in a sealed container, dried pasta will stay fresh and edible indefinitely. This means you can store it for long periods without worrying about losing its nutritional value or taste.

Reason 4: Dehydrated pasta is easy to store and takes up minimal space

Dried pasta is a great way to save space and weight in your emergency pantry. It takes up less room per serving and weighs less than nearly any other shelf-stable item. It can be packed in many ways: jars, vacuum-sealed bags, or large, airtight, modular containers made for stacking. No matter how you store your pasta, you can find a way to make it fit.

Reason 5: If you can boil water, you will eat.

You only need a pot of boiling water, your favorite dried noodles, and something to flavor it. Seasoning it with a little oil, salt, and pepper will work if you have nothing else. If you can add some dehydrated herbs like oregano and thyme to sprinkle, a simple bowl of pasta becomes insanely delicious.

What kind of pasta is best for dehydrating?

Almost any type of pasta can be dried in a dehydrator. The best kind of pasta to make fresh and dry for storage is made from just water and flour because there are no ingredients that might spoil. Adding other ingredients like powdered vegetables or garlic powder is fine, but we must pay attention when adding oils or animal products. Even then, if proper care is taken, adding an egg or a little oil is not as bad as some would have you believe.

When choosing the type of pasta to dehydrate, there are a few key factors to consider. For one, the shape and size of the pasta will affect how well it dehydrates and how long the finished product takes to rehydrate.

For example, smaller shapes like elbows or shells will take less drying time to rehydrate than larger shapes like lasagna noodles. Additionally, thinner noodles will dehydrate more evenly than thicker ones. This is because the surface area to volume ratio is higher, so the water can evaporate more efficiently.

Rolled vs. Extruded Pasta

When it comes to pasta, there are two main types: rolled and extruded. Rolled pasta is made by flattening the dough and rolling it either with a rolling pin or through a pasta maker, then cutting it into strands or pieces. Think lasagne, fettuccine or linguine. On the other hand, extruded pasta is made by pushing dough through a pasta extruder to create the desired shape. Macaroni, spaghetti, and most shaped pasta are usually extruded. Both types of pasta can be dried for storage, but they will dehydrate differently.

Rolled pasta is much silkier and more flavorful than extruded. One reason is that a period of kneading develops the gluten into long, uniform chains, similar to the gluten development in bread. The other reason is that rolled pasta doughs usually contain eggs. This means you must be careful to dry it entirely in a dehydrator to destroy all bacteria.

On the other hand, Extruded pasta is usually made with just flour and water and needs to be so dry that it crumbles – so there is no kneading or gluten development. The lack of oil or fat in extruded pasta makes for a more durable end product and is more suitable for drying and storage. However, extruded pasta makers are either very expensive or very cheap and unreliable.

Drying Egg Pasta

Using a dehydrator to dehydrate egg pasta is much safer than air drying for three reasons:

  1. The typical temperature setting used to dehydrate pasta is hot enough to kill any foodborne bacteria.
  2. The dehydrator can dry pasta completely. Lowering the moisture content in the pasta will also kill the bacteria.
  3. If some miracle, some dangerous microbe managed to survive the too-hot temperatures and lack of moisture, pasta must be boiled to thoroughly rehydrate from its dry state.

The bottom line is that salmonella and other human-harming foodborne bacteria can’t survive through one aspect of the pasta storing and cooking process, let alone all three.

About Fats and Oils

So what about adding a little olive oil to your pasta? What about adding a bit of sesame oil to your udon? And making pasta with whole-grain flour will be healthier, right?

Not so fast! Adding fats and oils – including eggs in egg pasta – can cause your end product to be shelf stable for a shorter time.

The biggest concern with dehydrating these types of pasta is the fats and oils added to the dough. These can oxidize and go rancid over time, causing an entire package of homemade noodles to become inedible.

And you will find all kinds of expert advice warning you against dehydrating and storing anything containing fats without storing it in the freezer afterward. This advice should be taken into account.

But in reality, rancidity is avoidable. I’ve never had anything go rancid. I’ve also talked with several other seasoned dehydrator users and have not heard of a case where rancidity caused problems.

Using high-quality ingredients can help ward off rancidity, but proper storage has the most benefit. I’ll talk more about how to keep all of your dehydrated pasta shelf-stable for long-term storage later.

Method: How to Dehydrate Pasta in a Dehydrator

This method assumes you already know how to make fresh pasta. If you don’t, look at this experiment over at Serious Eats, but remember that pasta dough is easy. If you only have a single egg and all-purpose flour, use it. Get into it and enjoy it.

You will need

  • Your fresh pasta in whatever shape or cut you prefer
  • A food dehydrator with drying trays
  • Flour for dusting
  • For long noodles, a scale is convenient

Step-by-step instructions

  1. If pasta is freshly cut or shaped, let it rest until it dries enough to be safely handled.
  2. Generously sprinkle flour on your countertop. Place empty dehydrator trays next to this spot.
  3. When the pasta has rested enough to handle, lightly dust it with flour.
  4. For long noodles, like spaghetti, fettuccine, or linguine, weigh out approximately 4.5 oz of noodles for a single serving.
  5. Move pasta pieces to a dehydrator tray. If using shapes or wide noodles, make sure each piece has enough room. No touching, if possible.
  6. If you’ve weighed out your long noodles, create a pile or nest for each serving directly on the tray. Keep piles loose to allow air to flow through.
  7. Once the trays are all full or all pasta is used, place all trays in the dehydrator.
  8. Set the dehydrator to 135°F and turn it on.
  9. After two hours have passed, check on the pasta. If it bends or springs back quickly, continue dehydrating. Keep checking every half hour. Most pasta will be finished after four hours, but it could be as long as 24 hours, depending on your ingredients and noodle thickness. It isn’t easy to dehydrate your noodles too much.
  10. Noodles are finished when they snap instead of bending when folded.
  11. When it’s time to cook your pasta, keep a very close eye on it. There is no real way to tell how quickly it will cook—cooking time will change based on what fresh pasta recipe you used and how thick your noodles are.

How to Store Your Freshly Dehydrated Pasta

Bag into the number of servings required to feed your family for one meal. A serving of dried pasta is typically 2 ounces, though I admit I double up for spaghetti. So consider what you use to make a meal and weigh your pasta accordingly.

If you aim to eat your freshly dehydrated pasta in the next three months, storing your pasta in airtight containers and Ziploc bags is acceptable.

If you want to keep your pasta on the shelf indefinitely, vacuum-sealed bags will keep excess moisture and air out for long-term storage. This is more important in places with high humidity than in arid areas. Pasta is very hardy, and it’s unlikely anything will happen unless the vacuum seal is broken.

Add oxygen absorbers to your vacuum packs if your pasta has fats or oils. They will keep oils from oxygenating and going rancid. If you want extra protection against lingering moisture, consider adding silica gel packs.

Conclusion

The bottom line is that you can dehydrate pasta in a dehydrator without any problems if you take the necessary precautions. The entire process can take as little as three hours or as much as  Your shelf-stable dehydrated pasta will last indefinitely by using high-quality ingredients and proper storage methods.

I hope this article has helped clear up some misconceptions about dehydrating pasta. It’s a great way to have a quick and easy meal on hand and a great way to preserve your pasta for long-term storage. So get dehydrating!

Bonus: My Super-Quick Fresh Pasta Lunch Recipe

This great little fresh pasta recipe will help you learn how to work a pasta dough and understand how it should feel and respond. It’s a small enough recipe to make a small pot of pasta several times a week.

Mix 100g of flour with an egg to start. Once the dough comes together, rest for 10 minutes, then knead for about 8 minutes (or use the dough hook on a KitchenAid for 5) until the dough is springy and silky. Rest for 30 minutes more. Cut or roll into the desired shape (I’m making farfalle) and let rest again until firm enough to handle. Cook in salted boiling water for 1-2 minutes and remove. Cooking for longer than 2 minutes will make your fresh noodles soggy and gross. Serve with your favorite sauce or sprinkle with coarse salt, cracked pepper, olive oil, and Italian herbs.

FAQ

Can I dehydrate pasta using an oven?

You can dehydrate pasta without a dehydrator, but your results may vary. Dehydrators are built to keep an even temperature, while ovens often won’t hold a temperature below 170 – much too warm for dehydrating pasta.

I can’t say for sure, but I bet no oven will run at a low enough temperature due to food safety concerns.

How can humidity affect how my pasta dehydrates?

If the humidity is too high, your pasta will not dehydrate properly. It’s essential to make sure that the air in your dehydrator is dry for the drying process to be effective.

How can I tell if my stored pasta has too much moisture?

Signs of moisture include mold, precipitation inside the package, and limp or soft noodles. If you find a container of homemade pasta with the seal broken and any sign of moisture, especially in an area with high humidity, throw it out.

What kind of flour is best for making shelf-stable pasta?

Different flours will yield different results, but a combination of all-purpose and semolina flour mixed with plain water works best overall. You can also use all-purpose or gluten-free flours if you prefer. Experiment with different recipes and find one that works well for your dehydrator.

Can I dehydrate pasta with sauce on it?

Yes, but you must cook your noodles first instead of dehydrating fresh pasta. Make your pasta and sauce the way you like it, as if you were about to sit down to eat it and throw it on a dehydrator tray lined with parchment paper. It’ll need a good 24 hours to dehydrate thoroughly.

The rehydration part will depend on what’s in your meal and how much sauce you have. Try weighing your spaghetti before and after dehydration and adding the difference in boiling water.

Many backpacking sites and forums have plenty of great recipes, like this exciting recipe for Pasta Bark from The Backpacking Chef. (Full disclosure: I’ve never tried it.)

What’s the best way to make pasta dough and noodles at home?

The internet is full of opinions, recipes, and guides, and they’re all probably valid. Pasta is a very forgiving dough that can be as simple or complicated as possible. The most basic pasta is just flour and water or flour and egg, but there is no end to the additions and combinations you can make.
Previous
Next

Toilet Paper Tablets: What They Are and Why You Need Them

/
Updated:
Toilet paper tablets are a good way to save space in your bugout bag.

Imagine this: You are on foot, crossing through forested land after a catastrophic event. You’re still a day away from your safe house when suddenly, nature calls. You know that to avoid that nasty tingly feeling later in the day, you need to wipe – but with what? When you packed your bugout bag, you couldn’t justify how much room a whole roll of toilet paper would take up but hadn’t yet considered a good alternative.

The Width of a Toilet Paper Tablet

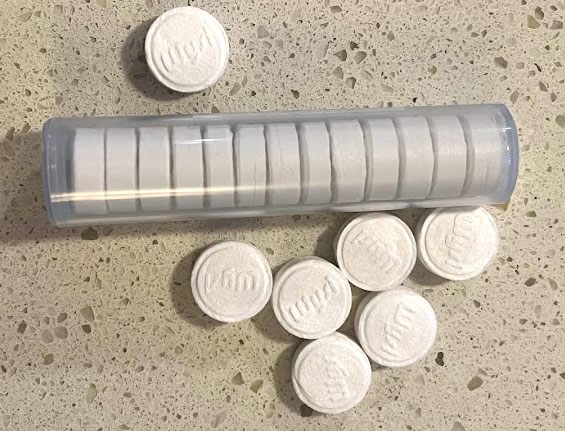
A toilet paper tablet is a small sheet of nonwoven cellulose or cotton that has been compressed down to the size of a coin. It is easy to carry, and its small size takes up much less room in an emergency pack than most other toilet paper alternatives. They turn from small tablets to useable toilet paper with as little as a teaspoon of water.

I’ve explored countless TP options to pack in my bugout bag over the years, and these tablets may be my favorite. Keep reading to find out what’s great – and not so great – about toilet paper tablets.

What is a Toilet Paper Tablet?

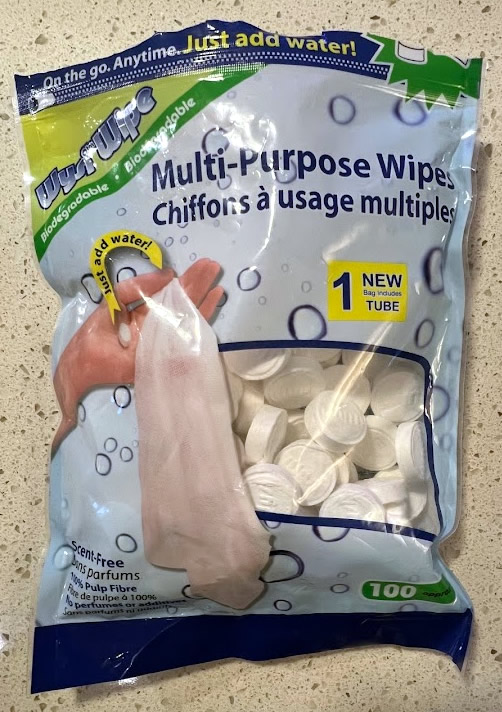
Wysi Wipes Compressed Towels

A toilet paper tablet is a small sheet of cloth-like material compressed into a tablet. The brand I have the most experience with, Wysi Wipes, has three different sizes of tablets; the smallest is about the diameter of a nickel. There are several other brands, and they all work the same way. Add a bit of water, and use them as you like.

These tablets are not the same as household toilet paper. Compressed toilet paper tablets are sheets of cellulose material similar to bleach wipes – but thinner. They are stronger than normal toilet paper but still pliable. Since they’re soft to the touch and contain no chemical additives, toilet paper tablets are fine for sensitive skin.

Why You Need Toilet Paper Tablets In Your Bugout Bag – And Everywhere Else

The simplest answer is that they’re better than a toilet paper roll. When was the last time you saw a well-traveled roll of toilet paper? I bet it didn’t look that great – toilet paper rolls don’t travel well. They also take up more room, are prone to disintegrate, and will take on any moisture.

Though other methods of packing regular household toilet paper in your bugout bag exist, none compare to the toilet paper tablet. I’ve tried vacuum packing unrolled toilet paper, and while it does take up much less room than a full roll, it’s still regular toilet paper with all the same issues.

Napkins are tougher and can take more abuse than regular toilet paper, but they still use more valuable space than a toilet paper tablet. Napkins are also more likely to scratch your bottom.

Others swear by premoistened wipes, like baby wipes or wet wipes, which take up more room and can spread their premoistened-ness all over. (Their stinky, perfumey, premoistened-ness. All over my go bag. Never again.)

A toilet paper tablet waterproof container

The only real downside to tablets is that they expand when accidentally exposed to moisture. Even then, they’re still usable. I usually just use the travel tube in the package, as it’s pretty good at protecting the tablets, but it’s not entirely reliable.

If moisture is a concern, find a portable size watertight container, such as this one.

Never get the tablets that are individually wrapped. Not only is it incredibly wasteful, but in a survival situation, it’s just another piece of litter that could lead others to you. Leave no trace.

How to Use Toilet Paper Tablets

I’ll spell it out for you because this is the internet, and you can’t actually see the wipes. I’ll even put in some crappy pictures. (No pun intended.)

First, wet the toilet paper tablet with a few drops of water.

It takes only a teaspoon of water to unroll the small Wysi Wipes, which I imagine would be the same amount needed for wipes of similar size. A teaspoon is only 5ml or 1/6 of a fluid ounce – no matter how you slice it, that’s not much.

Second, unroll the sheet.

Make sure to get your wipes ready before you head to your spot. Though the tablets soak up the water quickly, it feels like it’s something you should do in advance.

Third, use it like regular toilet paper.

You can manipulate the cloth a little bit. If you gently pull it one way, you can make it less of a square shape and more of a longer rectangle closer to actual toilet paper. Fold or crumple at will, and wipe away.

I took this video to show you just how little water it takes to unroll a small tablet. The little measuring beaker I used is a 5ml beaker, and not all the water was used.

Like my little beaker? It’s made by OXO, and is available here.

How To Properly Dispose of After Use

When you’re done with the toilet paper tablet, either bury it with your deposit or safely throw it away. The tablets are entirely biodegradable and will decompose over a matter of weeks. They are safe to dispose of in outhouses and pit latrines/toilets.

They are safe to compost, both in your backyard or bin managed by your city. Some facilities may require you to bag wipes contaminated with feces or other bodily fluids in a compostable bag. Composting them into your veggie garden is not a great idea, as fecal matter can contaminate your produce.

Warning: Toilet paper tablets are not safe to flush, even if they are marked flushable. They are not septic tank safe, and they can clog plumbing in houses or RVs. Even at the city level, wipes clog up the sewer system. And it’s not just the city’s problem. According to the Patty Potty, an informational initiative from Save Water Texas, huge costs to continually clear out ‘clogbergs’ are always passed onto taxpayers.

So, what makes normal toilet paper safe for plumbing? Regular household toilet paper is designed to disintegrate soon after it’s submerged – in minutes. Toilet paper tablets and most other wipes will dissolve eventually, but not nearly fast enough to avoid binding with other materials and causing clogs.

An up-close view of expanded toilet paper tablet cloth

Other Uses for Toilet Paper Tablets

You can use toilet paper tablets for other things besides wiping your rear. I don’t reserve them for just my go bag; I put them in my emergency kit at home. I keep them in the car, as the kids like using them to clean up. I take them camping and hiking, and I’ve even used them as coasters. (They work great, by the way.)

General Hygiene

Because toilet paper tables are absorbent, you can use them as a napkin or facial tissue in a pinch. Because they are strong, they can be rinsed out and used as a washcloth for those wilderness sponge baths. A hydrated toilet paper tablet will absorb any dirt, grime, or sweat and hold onto them until rinsed out. You might even want to look for some larger tablets for this reason. They’re often referred to as compressed paper towels.

Firestarter

We’ve all been there. You’re out in the woods, trying to get a fire going. Your supply of firestarter is running low, or maybe it isn’t catching fire for whatever reason.

Toilet paper tablets make for great tinder. When in compressed form, they can burn slowly and steadily. When expanded and dried, they burn slightly longer and hotter than regular toilet paper.

Spills and Cleaning

Have a small spill? Dab at it with a toilet paper tablet, and you don’t even need to activate it beforehand. A single tablet can soak up spills quickly. Because they are single-use, you don’t have to worry about cross-contamination.

You can also use them as dusting cloths or to clean your glasses. I’ve noticed toilet paper tablets don’t leave lint behind like regular toilet paper, which is suitable for cleaning sensitive equipment.

Turn Into an Antibacterial Wipe

Since there are no harmful ingredients, there is very little concern about what you can wet them down with. Pack small waterproof containers with antibacterial agents such as bleach, rubbing alcohol, vinegar, or even lemon juice. These liquids will all work with a portable wipe but don’t mix them unless you know what you’re doing.

Wound Care

Though they aren’t a replacement for a sterile dressing or for bandaging wounds, toilet paper tablets can be used to clean minor cuts and scrapes. To turn them into a hygienic wipe, you can hydrate them with any liquid, including saline, alcohol, or hydrogen peroxide. A compressed toilet paper tablet will absorb blood and keep the wound clean until you can properly treat it.

Because tablets are chemical and lint-free, they won’t gum up the injury, but they are not ideal for use as a wound dressing, as they will stick to and become part of any blood clots and scabbing.

Are Compressed Towels and Toilet Paper Tablets Environmentally Friendly?

The short answer is not really. On the one hand, these tablets are biodegradable. After you finish them, they will compost and break down completely, making them ideal from a zero-waste perspective. On the other hand, manufacturing processes are not very eco-friendly as every step of the process, from farming the tree to delivery, will add to their carbon footprint. But then again, so does everything else.

Toilet paper tablets are made of certain fibers that vary depending on the manufacturer. Although cotton is sometimes used, Viscose (aka Viscose Rayon), cellulose, and pulp are the most common fibers.

The procedures for creating Viscose, cellulose, and pulp fiber are similar. The main component is derived from specific types of trees. While the finished product is considered safe,  eco-friendly, and hypoallergenic, the manufacturing process is highly polluting. Chemical agents such as carbon disulfide and sodium hydroxide are frequently discarded into nearby waterways after being exhausted.

There are also concerns about the impact of viscose production on deforestation, as tree farms are often expanded to meet the demand for this fabric. In many ways, Viscose is the ‘palm oil’ of the textile fiber world, and there is a growing movement to find more sustainable alternatives to this fabric.

Cotton is not much better. Like Viscose, cotton farming also brings fears of deforestation. Expansion of cotton farming continues because cotton is produced more than almost any other fiber, second only to polyester. Though it is a natural fiber, current mass farming practices use large amounts of land, water, and pesticides.

Some producers are switching to more environmentally friendly methods of producing cotton, such as using fewer chemicals and sustainable land and water use. Though these methods are clearly better, they are more expensive. I wouldn’t bet that we would find such materials in compressed toilet paper tablets.  (Prove me wrong, manufacturers!)

Conclusion

Toilet paper tablets are one of the better toilet paper alternatives to pack in a survival pack. Though they have some drawbacks, such as clogging plumbing and septic systems, the benefits outweigh the negatives. They take up less room than toilet paper, are easy to use, and are biodegradable.

Now imagine this: You’re on foot, miles from what’s left of civilization. You get that feeling that you will soon need to make a pit stop. Thankfully, you remembered to pack a few tablets in your EDC bag. Of all the worries you have, a dirty anus is not one of them.

Previous
Next

Four Firearms Every Prepper Needs for a Well-Rounded Battery

/
Updated:

We can’t talk about prepping without talking about firearms. As a prepper and avid hunter, I believe firearms are tools of necessity. Should an emergent situation arise, I know I can provide food for my family. Should all law and order collapse, I have confidence that I have the proper selection of firearms to protect them. Though no single firearm can handle all jobs, this selection will.

Every prepper should have a primary battery of four firearms, each suited to perform different tasks. Examples include a .22 long rifle, a 12 gauge shotgun, a high-intensity rifle, and a pistol. When selecting firearms of each, consider the availability and versatility of the ammunition required.

Full disclosure: Like literally everyone else, I have strong opinions on the subject of reform, societal influences, and crime statistics. However, I will never use this site to glorify firearms or to further a political agenda. I do not have any political associations, nor am I a member of any related groups. I believe safety and knowledge are crucial. Suppose we are to have rational discussions about a firearm’s usefulness to a prepper. In that case, we must stick to those subjects in a way that educates and promotes social and personal responsibility.

Before You Start: A Few Words on Safety and Storage

Firearms demand respect. Regardless of how it happens, your firearms can take the lives of others if placed in the wrong hands, be it the hands of a thief or a toddler. Respect your firearms, and they will serve you well.

Your first task is to complete as much training as you can. Find a good training center and take all their basic safety and operation courses. They can also help you choose any certification or licensing courses your local laws require you to complete.

Even if you never plan on owning a firearm, training is a necessity for you and everyone in your family – even your kids. In a situation where you and your family are working to survive some catastrophic event, you should absolutely know how to pick up that .22 you found in some abandoned shed because you might be able to shoot your next meal with it.

Lastly, make your storage plan and get it in place before making your first purchase. Do more than the bare minimum of what your local laws require and all of what your safety classes recommend.

1. The .22 Rifle

This average little rifle will be the cornerstone firearm of your battery. It’s a great little gun for several reasons, mainly because it’s light and cheap to operate. If a cataclysmic event occurs and the need arises to leave my house on foot, this is the rifle I will grab on my way out the door.

It’s not just the rifle itself that’s light, either. Ammunition is small and light, as well. You could easily carry 50 rounds in your bugout bag, which will take up less room than a bar of soap. It’s inexpensive, too – I like to pick up a brick of 500 for around $45. While .22 ammo is not great for reloading, the price, availability, and weight make it easy to load up your prepper storage with an ample supply.

The .22 rifle is an incredibly versatile and valuable firearm, and it’s ideal for training new and seasoned shooters alike. Though I wouldn’t be overly confident with it, it has enough power to take down deer-sized animals with proper shot placement from within a reasonable range. Don’t expect it to drop a deer in its tracks, but if you’re starving, it’ll get the job done. There is a reason why it’s the most-used rifle for poaching deer.

It’s also adequate for self-defense. Though there are far more powerful firearms, there is no doubt that a .22 will injure and disable a threat, which you need in a survival situation where legal ethics may not matter.

In fact, amazing feats have been accomplished with a .22.

The biggest grizzly bear ever killed in Alberta, Canada, was taken by a 63-year-old Cree woman carrying her old, beat-up Cooey Ace n 1953. Bella Twin was a lifelong hunter and trapper. She reportedly came across the bear while out berry picking one day. Without much hesitation, Bella used her .22 to plant a bullet in the side of its head. Though the bear dropped, likely killed by the first shot, she placed a few more rounds in the same vicinity to ensure her victory over the bear. The rifle and the grizzly’s hide are in the care of a museum in Edmonton, Alberta, Canada.

A .22 rifle should be in everyone’s battery. Many companies make single-shot youth models that are compact, light, and highly economical. Perfect for throwing in a bugout kit or keeping close for emergencies.

Many companies make a .22 caliber pistol if you need something more compact. The Ruger Rangler runs a couple hundred, or on the other end, competition target pistols are available for much higher. Many options lay in between, and you can find a good fit depending on your needs.

2. The 12 Gauge Shotgun

The second addition to your battery is a 12-gauge shotgun. This firearm is the #1 all-rounder, mainly because of the vast array of shot sizes available. It can also shoot slugs, flechettes, coins, and more uncommon self-defense loads. If a cataclysmic event occurs and I have to leave – but weight isn’t a concern – this is the firearm I’m taking.

A 12 gauge pump action with a 3 ½ inch chamber will shoot all 12 gauge ammo. I would only purchase the two shorter cartridges, but if I were in a situation where I needed ammo, and 3 ½ is all I could find, I’d be fine. Longer shells carry more shot, but it’s not worth the cost or the extra weight.

For preppers, the draw is the unimaginably large selection of ammunition and the use of shot. When a single load fired from the barrel delivers multiple projectiles in the direction of a smaller moving animal, your chances of hitting your target grow.

Though they aren’t anywhere as light as a .22, the 12 gauge is better for hunting. Shotguns are better for small game and fowl with shot, but when loaded with slugs, they can ethically and safely take down all sizes of game in North America.

While shotguns are categorized as firearms, most jurisdictions consider them sporting firearms, so restrictions surrounding them are often lighter. You never hear people screaming about getting all the shotguns off the streets.

3. A High-Intensity Rifle

This category of firearms is the largest because it spans both hunting and military cartridges. Depending on your rifle and cartridge combination, more power, range, accuracy, and speed are all possible. When considering your addition to your prepper battery, the most flexible option would be a semi-automatic military-style rifle, which you can use for defense and hunting. Still, if that’s not your style, a bolt-action will do just fine.

While shotguns can take down their targets by spraying the field with shot, modern rifles are far more accurate and have far superior knockdown power at extended ranges. This accuracy and power come at a cost; they require more training and practice to operate sufficiently, but the payoff is the ability to shoot larger game at ranges beyond 200 yards.

When selecting a high-intensity rifle, our objective should be the first consideration. Since we’re preparing for an unknown, possibly disastrous future, our focus should be on a cartridge suited for hunting and defense, paired with a reliable rifle that will be less likely to require repair.

If you want a rifle to take down deer and small game, a rifle that can handle 5.56mm NATO rounds is ideal. The benefit is that you can shoot both military-spec ammo and civilian hunting rounds. It has the bonus of also shooting .223 Remington rounds, but the reverse is not necessarily true. Using 5.56mm NATO rounds in a .223 chambered rifle may cause explosions or damage the barrel.

If your ideal game is larger than a deer, look for a similar variety of rifles, but chambered in .308 Winchester. A .308 rifle can shoot all .308 and 7.62x51mm NATO rounds. Both cartridges are extremely common in the civilian and military shooting world.

If you have to stray from standard military sizes, stick with rifles chambered for .30-06 Springfield, .270 Winchester, 6.5 Creedmoor, 7mm Remington Magnum, or another extremely common caliber.

Why Choose a Rifle That Accepts Hunting and Nato Military Loads

In 1980, NATO standardized all gun loads across all member nations. It created redundancy in their stores, and no matter what was happening in the world, as long as one member country was producing ammo, all NATO troops could shoot it.

The USA, Canada, Iceland, and 27 European countries are heavily stocked with these rounds. To say they are common is an understatement. If there is a conflict similar to what we currently see in certain parts of the world near NATO lines, having a weapon that can use available ammo is to your advantage. If you are in NATO territory, roll with NATO.

4. The Pistol/Handgun

While a pistol is far from a powerful firearm with a very short effective range, it is critical to your stores. If you’re on your own and forced to travel on foot, you may need to carry two firearms. Taking a second long gun is an inexcusable weight expense. Enter the pistol. A compact and easy-to-carry pistol can ride… shotgun? (I’ll see myself out!)

Though they are nowhere near as powerful as any other firearms on this list, pistols have advantages. Pistols are the only real easy-to-conceal firearm, ammo is cheap and plentiful, and their accessibility can make them your first line of defense. And they’re a lot of fun at the range.

Any 9mm pistol used by western militaries makes a good choice because there is confidence in their real-world use. Pistol caliber carbine rifles can also be chambered in 9mm, using the same ammo for both. Apart from .22 cartridges, 9mm is probably the easiest to shoot because of its relatively low recoil and decent accuracy.

If more punch is needed than the 9mm can provide, revolvers chambered for .44 Remington Magnum or .357 Magnum are good options and can pair with lever-action rifles in the same caliber. Look for matching rifle and pistol sets.

For added flexibility, several manufacturers make single-action revolvers in .357 Magnum, also sold with a second cylinder chambered in 9mm Parabellum.

Final Notes

I wanted to keep this all relatively high-level because there are so many different (loud) opinions on what’s best. Here’s mine: It doesn’t matter what firearm you have if you don’t have any ammunition to fire. The suggestions listed here are based on how easy it is to stockpile ammunition now or how likely it would be to get more after the fall of civilization.

If you own one or more firearms, work them into your plan. Acquire firearms that complement yours to fill in the gaps. You might as well work with what you know.

Buy ammo. Learn to reload if you don’t already. Get all of the supplies you need. Once again, it’s all worthless if you have no ammo.

Last but far from least, follow your local laws. Get certified and licensed. Keep your nose clean. After working this hard for the future, the last thing you need is to have your battery confiscated over an oversight.

Previous
Next

This Is How Much Water You Should Keep In Your Car

/
Updated:

I polled a few people in my local prepper group to determine how much water the average concerned citizen keeps in their car. After all, we preppers take emergency preparedness so seriously that we can convince ourselves we need every multitool in existence. It would follow that we would all have decent stores of water in our cars, I thought. Boy, was I wrong.

Today, I will talk at length about why and how we should be storing water in our vehicles. I’ll also explain why we should make sure the water is there when we need it and why we should worry less about saving it.

Plan to take at least a gallon of fresh drinking water with you whenever you drive, local errands and short commutes included. Factors such as increased distance and number of people will require keeping as much as a gallon of water per person for each trip.

Why You should keep water in your car

A list of 5 reasons to keep water in your car.

We live in a society of convenience. The closer we are to urban areas, the easier it is to stop by a convenience store or drive-thru to quench our thirst. We need to stop at gas stations on big trips, which is a great time to pick up a couple of bottles at inflated prices. Regardless of all this convenience, we must keep water in our cars.

There could be 50 gas stations within walking distance of every point of your journey, and you should still have water in your car.

If you only use your car to drive the kids to school, take water. Even if you only use your car to go grocery shopping once a week, you need water in your car. Even if you commute to work the same way every day and have never been late, take water with you.

Emergency Situations and Survival Needs

Emergency evacuations can happen anywhere, at any time. A forecasted storm is far more dangerous than predicted, and you are stranded. A major bridge is suddenly out, and traffic jams up every other route, keeping you in gridlock for hours. You may find yourself stuck on the freeway with a flat, and the tow truck expects to take at least two hours. There are a million reasons you should keep drinking water in your car.

In July of 2021, a rainstorm in Colorado caused multiple rock and mudslides and stranded several cars in a tunnel complex overnight. Though Interstate 70 had been closed earlier that day because of flash flood warnings, it had reopened to traffic just hours before the slides. How many of those people were traveling with enough water?

More recently, a weather event called an atmospheric river descended in Canada, north of Washington State. It washed out all roads heading into the greater Vancouver area, a reasonably large metropolitan area. It left people stranded for days waiting for rescue, and those traveling by car realized they needed to make alternate plans.

Dehydration Can Lead to poor Survival Outcomes

I like to stay hydrated. Most of us are chronically dehydrated and don’t even realize it. From both survival and emergency perspectives, going into a situation dehydrated is almost as bad as having no water with you when faced with uncertainty.

Access to water is essential during emergencies, but the best reason to keep water in your car is because you might get thirsty.

Ninety percent of emergency preparedness, survival, and prepping is learning to be prepared. Hydration is essential to keeping your brain and body functioning at peak performance.

We don’t have an endless supply of water when traveling, but that doesn’t mean we physiologically don’t need it. Our bodies constantly release water in one form or another, and we must replace that lost water before dehydration sets in because it can take days to recover from even the lightest case.

When faced with an emergency, your starting level of dehydration factors into how well you will work through your situation. Always drink the water you have to stay hydated. Don’t ration and save it.  

Related: Water & Survival: You Need This Much Each Day to Live

Avoid Convenience. Opt For Preparedness.

Stopping for water at a convenience store is expensive and not the most environmentally safe practice. Spending a dollar or two on a bottle of water doesn’t seem like a significant financial drain, but that bottle essentially costs a fraction of a penny when poured from your tap. The time it takes to recoup the cost of even the more expensive reusable water containers is only a month or two if the alternative was to buy a bottle or three a few times a week from the gas station.

Watch those drive-thrus, too. My kids are always trying to get us to stop at certain fast-food joints because they’re soooo thiiiiirsty. Because I keep fresh water (and all the snacks) in the car, we’re far less likely to spend money on overpriced water.

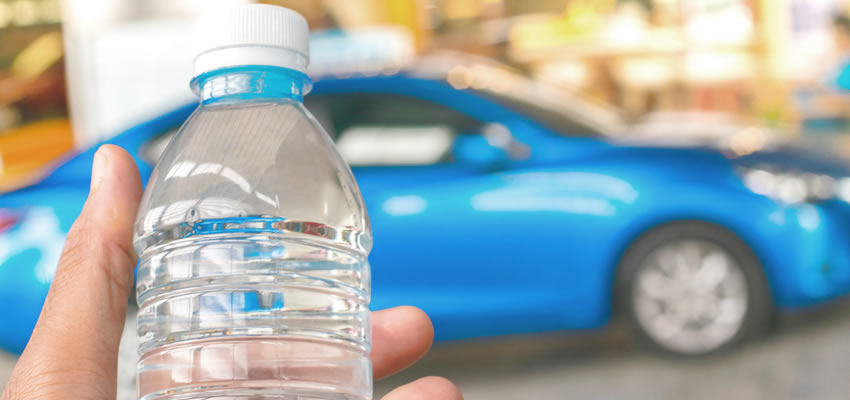
Your objective is to bring a fresh drinking water supply each time you drive. You can use tap water in reusable bottles if both water and bottles are clean. Refreshing your water every day is helpful and ensures that you will want to drink it in an emergency but storing sealed bottled water in your trunk is a good alternative.

How much water should you keep in your car?

We preppers and survivalists love to regurgitate the 72-hour mantra. The basics of emergency preparation tell us to store enough of everything to survive a 72-hour emergency. The rule of thumb is to store about three gallons of water per person to see you through the entire three days.

Applying that rule to your car trips would mean finding enough room in our vehicles to store three gallons of water for you, plus three more for each person traveling with you. If I am on a trip with my family, that means I need to store at least twelve gallons of water in my Outback. When it comes to keeping water in your vehicle for regular travel, the 72-hour adage is too much. We must strike a balance.

When we talk about having that much water on hand per person, we talk about having that much not just for drinking but also for cooking, cleaning, and personal hygiene. Since we’re traveling, we’re not doing a lot of cooking or cleaning. A roadside emergency might require basic hygiene, but not what we would need if we were in an emergency at home.

We can assume that we will drink 95% or more of the water used while traveling, so that’s where we will focus.

Your goal is to learn to calculate how much water you need to keep in your car. Consider where you plan to travel, the routes you plan to take, the time it will take to reach the destination, and how many people are traveling with you. With this information, you can determine the amount of water you should have stored in your car.

I have created a guide that divides trips into four zones. Read through each zone description to determine what zone your trip falls into and how much water you need. There is also a quick reference below the explanation of each zone.

Blue Zone

Your Blue Zone is your ‘Home’ zone. Travel spots within the blue zone should be primarily local. Think of the day-to-day stuff that requires travel to well-populated areas. Include your neighborhood and local shopping and entertainment spots. If your place of work is less than 10 miles away, include it. These are the places you confidently know.

Ideally, all places in the blue zone should have well-established, incredibly familiar routes. You should be able to walk home easily if the need should arise. No matter where you stop along your way, water should be available without walking for more than twenty minutes.

Your need for water is minimal in the blue zone, but I recommend always carrying an entire gallon of water in your car. You might think it’s a lot of water to keep in your car if you stay local, and you might not be wrong.

But this exercise aims to plan an emergency water supply in your car. A whole gallon of water will comfortably cover four people for a full day, regardless of why they can’t get home. Since water is still attainable everywhere, life-threatening dehydration isn’t a worry.

There are a few exceptions to the 10-mile blue zone rule. Traveling in extreme weather, over state lines, or over geographical or geopolitical separators should be treated like green zone trips. Read the next section for more information.

Green Zone

Your Green Zone is your ‘Familiar’ zone. Travel destinations in the green zone should should be limited to 150 miles or 3 hours of driving time from your home. My 150-mile radius is a guideline I use because most drivers are at least a little familiar with what lies 150 miles in most directions. Many of us can get to other towns or popular areas without a map. You can usually drive 150 miles in three hours, which is why day trips fall into this zone.

Your travel should take you through neighboring communities, trips to and from suburbs, or other well-populated areas. Include your place of work if your commute is more than 10 miles. If you can pick any point on your planned route and find a place for water within 25 miles or less, you’re in the green zone.

Your water needs are still low, but because this zone reaches out farther than your green zone, the possibility of needing extra water becomes greater. There is a significant increase in possible emergency stops on longer trips. Flat tires, a vehicle breakdown, extreme weather, and road closures are more challenging the farther away you are from your home zone.

Yellow Zone

Your Yellow Zone is much larger than your green zone, but in certain situations, you must treat trips within your 150-mile radius of your Green Zone like Yellow Zone trips.

Under ideal conditions, Yellow Zone trips are extended trips with pre-planned stops for shelter each night. Road trips driven entirely on established routes, regardless of length, fall in the Yellow Zone as long you plan to replenish your water supply at the end of each day. Think staying with friends or family or with hotel or campground reservations.

Shorter trips that typically fall in your Green Zone should sometimes be considered a Yellow Zone trip if there are other factors. Think about trips that take you across state lines, through areas prone to unstable weather, and on roads crossing geographical barriers.

Geographical barriers can be rivers with a single bridge in the area or a mountain pass. An accident could close a bridge, leaving you to wait for hours while the scene is cleared and investigated. Or the bridge could collapse, forcing you to backtrack and detour to the next bridge, adding another 100 miles onto your trip.

Mountain passes are notorious for avalanches, rockslides, and nasty accidents. Treat these routes with care, especially as our climate grows more unstable. Downed trees, unstable bridges, heavy precipitation, and extreme temperature changes can make travel difficult, if not impossible. Water isn’t the only item to pack in your emergency car kit, but it might be the most important.

The amount of water kept in your car for trips in your yellow zone should start with one gallon plus an extra quart for each person.

Red Zone

The Red Zone is the zone that covers trips most people don’t take. These trips take us off the beaten path through areas with little to no cell service and limited access to emergency services. Where is this primitive land? A road trip to Alaska might come to mind, but the reality is that there are many sparsely populated areas in America, and there are still reasons why some people need to travel through them.

But because cars are limited in space and even more so when traveling long distances, water becomes even more essential when traveling through Red Zones. Take as much as you can but take no less than three gallons for the journey, plus another gallon for each passenger.

And before you go, create a travel plan. Leave a copy with a trusted friend or family member who can alert authorities if you don’t check in by a particular time.

Summary

I have one parting tip for you. If you feel you need water stored in your car for long-term emergencies, avoid the emergency packets and cans sold online and touted by so many others in the emergency prep scene. Emergency water kits of this kind are made to part you from your money. They are expensive and not always reliable.

Be smart, and spend your money on something worthwhile, such as quality reusable water containers. Conservation of our lands demands we do what we can to minimize garbage and use what we have with purpose. Don’t create waste, and don’t pollute your backyard with single-use containers when possible.

A handy infograph depicting how much water you should keep in your car.
Click the image to download a PDF copy of this infograph
Previous
Next

The Minimum Amount of Water Per Day To Survive: A Critical Guide

/
Updated:
How much water do we need to survive each day?

I don’t have to tell you just how vital water is to survival; I’d be making a good bet if I put money on the square that says, “People generally know they die without access to water.” Even though most humans are lucky enough to have access to clean drinking water, knowing how water scarcity affects our bodies can save our lives and the lives of our families.

Daily Water ConsumedDays to Live*
No Water3 – 6 days
500 mL (16.9 oz)7 – 14 days
1 L (33.8oz)15 – 30 days
2L (67.7oz)Indefinitely
*Based on average adult male at rest under favorable conditions

A person can live for about a week without water under ideal conditions. Environmental factors, health, age, and exertion will cause the body to lose water faster. A person can live for up to two weeks if only 16oz of water is consumed daily. A minimum of one quart of water per day is required to keep an average adult male hydrated for up to a month. A minimum of two quarts a day is needed to live indefinitely.

I’ve talked about storing water from an emergency preparedness perspective, but survival is a different animal. A freak situation could cut you off from your water stores at any time. We like to prep for earthquakes or other events that might happen, but what about fleeing from environmental disasters like flash floods or fires? Or finding yourself injured and stranded in the wilderness? Knowing how your body handles water and dehydration is key to survival.

What’s the minimum amount of water needed per day to survive?

Science doesn’t offer any firm answers on exactly how much water we need to survive daily. Scientists don’t test fatal levels of dehydration in a controlled experiment because, well, people would have to die to complete the experiment. That’s clearly not ethical.

And while we can tease out some information out of the current scientific research, too many factors play into hydration to know just how much water each person needs to drink to stay alive in a specific survival situation. Age, health conditions, climate, starting level of hydration, exertion, and body temperature can all affect how much water you need just to function at a basic level.1

We might not be able to predict the bare minimum amount of water we need to survive, but we know a few fundamental truths. An adult man in good health – let’s call him Average Guy – can live in a moderately dehydrated state for about four days before experiencing severe dehydration. A daily water intake of two cups can keep dehydration from reaching dangerous levels for an extended period. A full liter of water can keep even moderate dehydration at bay.

But there is a caveat – Average Guy is in a place where the temperature is just right, with no direct sun and no wind. And he doesn’t think about moving anywhere, either. We’re rarely Average Guy. In most cases, surviving a crisis means covering ground regardless of climate. It also calls for us to exert energy to build shelters, forage, hunt, and search for water that can be made safe.

How does my body lose water?

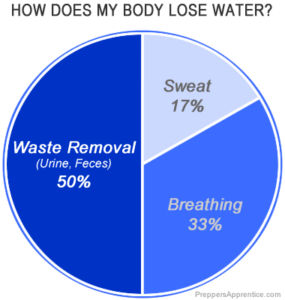
A typical day would see us lose around three quarts of water, given that you are fully hydrated and not losing extra water to exercise, extreme temperatures, injury, or illness. We lose that water in three ways.

Breathing – Under normal circumstances, 33% of daily water loss is lost by exhaling air. Our lungs need to keep moisturized to function appropriately, but the constant contact with air combined with the warmth of our bodies leads to a lot of evaporation. Remember Average Guy? He’s losing about a quart of water just from breathing normally.

But survival situations keep us from being Average Guy. Other factors that increase the amount of water lost via breathing include temperature, humidity, and heightened cardiovascular movement.

Since lungs like moisture, it makes sense that humid air is a boon to them. If the air we breathe is already hydrated, less water is lost because our lungs aren’t working to stay hydrated – the water is already there.

But we can’t always benefit from humid air. In arid climates, we exhale moisture that our lungs need to stay hydrated, leading to an increase in overall water loss.

In freezing temperatures, our lungs react in a similar way to a dry climate. Our lungs lose more moisture during cold temperatures in the same manner. When the temperature falls below 10°F or -10°C, our exhalation turns from whisps to small clouds that trail us as we walk.

The last contributor to water loss via the lungs is cardiovascular movement. Once you get your heart rate up, your lungs demands more oxygen to feed your cells. That means more breaths per minute, often deeper and harder. Deeper, faster, harder breathing means more water exhaled.

Breathing through your nose, when possible, will keep the rate at which you exhale water down.

Skin – Average Guy is losing about 17% or about half a quart of his water from his skin. He’s in a nice, shady spot on a nice day. He’s going to stay there all day. Lucky guy.

But even if we are in a situation comparable to Average Guy, your skin will still use water. Our skin has a massive surface area, and like the lungs, needs to stay moist to function correctly. Moisture is naturally lost because it’s a water-permeable barrier.

Surviving means moving, and moving means sweating. You’re searching for a source of water. You’re hunting. You’re building out your camp or trying to cover as much ground as possible toward your destination. The weather is rarely perfect, and you know that when you are moving hard, sweat happens.

Extra sweating also happens when we’re overdressed or have a fever. Some illnesses and medications naturally cause us to sweat as well.

Body Waste – Day-to-day, this is where we expect to see our greatest loss. A hydrated person will have pee that’s mostly water. Our digestive system is incredibly good at reclaiming the water we use, so that’s usually okay. Captain Average can expect a daily loss of about 50%, or 1½ quarts. More if water is abundant and your kidneys are working to flush excess water out.

Survival situations can turn those numbers on their heads. Dehydration causes urine output to decline as your body starts to hold onto what it can. A virus or bacteria accidentally consumed can cause your digestive tract to strip water out of your reserves to flush out its attacker with a wicked case of diarrhea.

At a bare minimum, your kidneys will use about 16 oz of water a day if you’re not severely dehydrated.

What happens if you don’t drink enough water?

Your body will work hard to retain enough water to keep everything working, but as its level of hydration declines, some systems are slowed down or shut off in an effort to hoard what is left.

We usually think of thirst as our first real sign of dehydration, but by the time we experience a strong feeling of thirst, our bodies are well into the first stage of dehydration.

Long before we feel an intense thirst, we often feel hungry. Up to a third of our daily fluid intake comes from food, so our bodies naturally look for food as a source of hydration. This hunger-thirst feeling is well-known in the weight loss world, where tips to keep your water intake high are standard in almost all diets and fitness protocols.

When actual thirst is detected, often together with a dry mouth, your body is well on its way to moderate dehydration. Your body will soon take drastic action to hold on to what it has left.

The stages of dehydration

Dehydration starts when water loss exceeds consumption. That’s a pretty fine line, and we aren’t tuned in to our bodies enough to know where that line is. If left untreated, death is inevitable.

Before Mild Dehydration (~%2 of total body water volume loss)

You might feel hungry or munchy. This is your body’s first call for water. This is a natural reaction since we get a lot of water in our food. Your urine may be slightly more yellow than usual. You feel like you might not be up to performing strenuous physical activities.

Average Guy has lost about 800ml of water.

Mild Dehydration (~5% water loss)

The body is now actively pulling water out of places to use elsewhere. You are legitimately thirsty. While it’s evident that your mouth would become dry, more is happening behind the scenes.

Some cells in the brain begin to dehydrate. We become moody, our memory falters, and we probably get a little headache.2 We’re not sweating quite as readily as we might under normal circumstances because our skin is beginning to dry out.

Our muscles also start releasing water. Our blood pressure lowers because our blood is beginning to thin out. We generally feel tired, weak, and a little under the weather. We might feel lightheaded.  Maybe we experience some muscle cramping. The body is telling us to slow down and conserve.

You aren’t urinating as much, and it’s a stronger yellow when you do.

Average Guy has lost about 2L of water.

Moderate Dehydration (~6% – 10% water loss)

This is where things get very uncomfortable. The body is working to maintain all systems at the lowest levels it can. We feel parched. Our eyes are dry and sinking into their sockets. Our lips crack, and our tongues might swell. Our skin has lost so much water that it has lost its elasticity and looks thin and wrinkly. The headache is so bad, and it’s killing our appetite. Our hands and feet feel cold, maybe even a little tingly.

Our blood pressure is so low that it might be hard to take our pulse at the wrist, but it’s shallow and rapid when we find it. We’re breathing rapidly as our lungs are drying out and working overtime to get oxygen to the heart. We might faint, or we might experience convulsions. Sometimes, we experience confusion and lose awareness for short periods.

We’re rarely urinating. Urine is very concentrated – a very dark yellow, almost orange.

Average Guy has lost between 2.4L and 4L of water.

Severe Dehydration (10% – 15% water loss)

It’s the body’s last stand. Systems slowly shut down to keep the brain, heart, and lungs going just a little longer. There’s a good chance that, if rescued, you could recover from severe dehydration with proper medical attention. But that’s if someone finds you – because you aren’t going anywhere on your own.

If you can urinate, it’s probably so dark, and it looks orange or maybe brown. The chances are good that your kidneys are shutting down.

The cardiovascular system has shut down almost entirely. Blood pressure is so low that you go into shock. Confusion, a delirious state of mind, and periods of unconsciousness make up most of the time you have left. Seizures are likely, and with enough of them, brain damage is certain.

Average Guy has lost 4 to 6 liters of water.

At 15% of water loss, death is imminent.

Should I ration water in a survival situation?

Rationing water in emergencies is not a good idea for many reasons.

We want to ration what we have because we feel we need to conserve just about everything when facing a crisis. But when water is in short supply, it is best to drink it. On the flip side, it’s counterproductive to overhydrate because your kidneys will quickly get rid of the excess.

If we’re talking about a small amount, like a 16oz bottle, consider it a road trip with a limited gas supply. You have 150 miles between you and the next gas station, an empty tank, and five gallons in the gas can. Giving the truck ‘sips’ of gas isn’t going to help you. If the tank can hold it, the gas should go into the tank, and then drive responsibly to make sure you can get as far as you can.

You function much better when fully hydrated than when not. Your cognitive skills begin to decline almost as soon as dehydration takes hold. It would be best to have a properly working brain to find the water needed.

The advice I see out there to take sips and wet lips is terrible. It’s wasting water. What are wet lips going to do for you? Make you feel better for five seconds? I get the psychological aspect of hoarding things in short supply, but it’s not rational in this case. Sipping water means you want to drink and are on the road to dehydration. Just drink it.

Water not consumed runs the risk of loss. A container can be lost or broken; water can spill, become contaminated, or evaporate. Things happen. When the last of your water ends up in the dirt, you make mud and nothing else except for maybe tears, which are incidentally also a poor use of water.

And if nothing else, keep the survival axiom about the Rule of 3’s in mind.

You can live for:

  • Three minutes without air
  • Three hours without shelter in extreme conditions
  • Three days without water
  • And three weeks without food

What are your chances of finding water in the next three days? Your dehydration level will be no different by the end of day three if you don’t find water, but your hydrated self might not make the same mistakes as rationing you could.

How can you minimize the water you need if stores are running low?

Staying hydrated in the first place, before an emergency takes place, will help. Drink as much water as your body needs every day, and then drink some more. A hydrated person will have more time on the clock to work through the stages of dehydration. Rationing the water you have in your body will also be much easier.

Stop eating when the water runs out. Because digesting carbs and protein requires water, it’s the one place you can store some of it in your body. But if you are out of water, digesting food will force your intestines to take it from other systems. In his book Basic Wilderness Survival Skills, Bradford Angier explains that when you eat, your kidneys use extra water to eliminate digestive waste.3

Work smarter, not harder. Whether you need to hike to your next location or build a base camp, expend your energy outside the day’s hottest hours. Also, don’t over-exert yourself. Between extra sweat, breathing, and heart pumping, the rate at which you lose water will be much greater than if you attack a job with a little less enthusiasm.

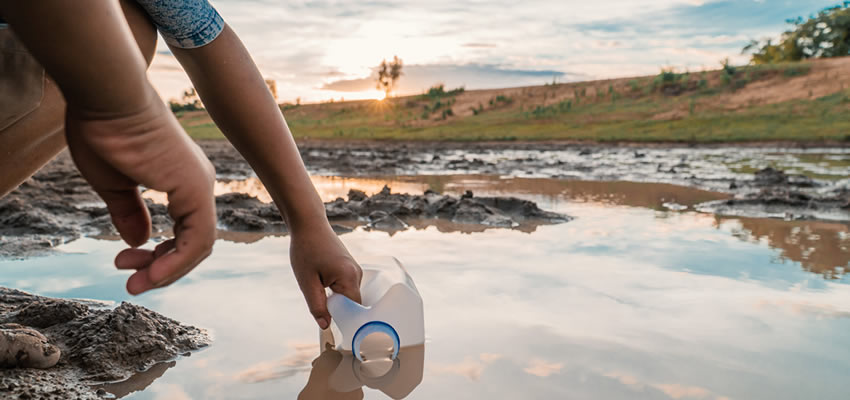
Don’t drink questionable water, and don’t eat questionable food. That stream might look crystal clear, but drinking water contaminated with microscopic parasites or bacteria can be life-threatening in emergency scenarios. Diarrhea and vomiting brought on by a case of dysentery or giardiasis can use up your internal water stores very quickly.

Sources

  1. Dehydration, MayoClinic.org. Overview of symptoms, causes, risk factors, complications, and prevention of dehydration ↩︎
  2. Recognizing a Dehydration Headache, HealthLine.com. Information on how to recognize and treat a dehydration headache ↩︎
  3. pp 94-96, Basic Wilderness Survival Skills, 2002, Bradford Angier. Detailed guidebook on surviving in the wild ↩︎
Previous
Next

10 Ways to Keep Your Fridge Cold During a Power Outage

/
Updated:

Every power outage I have lived through, regardless of the length of time, triggers an immediate question: Is my fridge going to stay cold enough? Though most power outages are short, lasting only a few minutes to a few hours, losing hundreds of dollars of food to a long-term blackout is unacceptable.

So, how can you keep your fridge cold without power?  The most basic advice to keep your fridge cold is to keep the doors closed as much as possible. A fridge will stay cold for a few hours, and a freezer will stay cold for a few days without any prep. Placing duct tape over the door will keep your family from mindlessly opening the fridge and letting cool air out. For most blackouts, this is enough.

To survive a power outage that lasts for days or even weeks, you must plan for it. You might already have an emergency preparedness plan in place that had you stock up on lots of shelf-stable foods. Even so, letting a fridge and freezer full of food spoil is expensive, and in some cases, dangerous.

Some of the following ways to keep your fridge cold in the absence of power are doable on the fly, but most are certainly not. There are a few ways to keep your fridge cold during a power outage that won’t cost much to put in place. Plan if you need your solution to be cheap. Plan to spend money if you want your solution to be dependable.

1. Insulate the Exterior of your Fridge

Collect any blankets, sleeping bags, or other insulating materials you have on hand and cover all sides of your fridge with them. Use towels to tightly pack the space between the bottom of the fridge and floor. Doing this will trap the cold air in your fridge and freezer, but only if you don’t need to go into it more than once a day.

Safety note: Make sure your fridge is unplugged if the power comes back on when you’re not home or sleeping.

This method works best on a combination fridge and freezer, as it allows the freezer to keep the fridge cool longer.

It can be done for no extra money and no real planning, assuming you have everything on hand. It works well short-term, but don’t expect your fridge to stay cold for more than a couple of days.

2. Use Frozen Ice Jugs or Bricks

This method can be done in several ways, but it can only really work if you have a chest freezer and extra space. It takes a little extra planning but has the added benefit of being a drinking water source.

Take several clean soda bottles, water jugs, or specialized water bricks and fill them about 90% full of drinking water. Tap water will work, but you can use filtered or other treated water if you like. Make sure to leave enough headspace for the water to expand as it freezes.

Place the jugs in layers at the bottom of your chest freezer, and then place your frozen foods on top.

When your power goes out, take a bottle from your freezer and place it on the top shelf of your fridge.  Why keep your ice on the top shelf? Just as warm air rises in your house, keeping your basement cold, warm air rises to the top of your fridge.

This method takes some planning. It can be done on the cheap, depending on the container you choose to use. You can keep your fridge cold as long as you have frozen water bottles to put in your fridge.

Related: Storing Water for Emergencies: How Long Can You Safely Store Water?

3. Use Frozen Saltwater Bricks or Jugs

The saltwater ice method works better for keeping a fridge colder than with regular ice, although the water is not suitable for drinking after it thaws. If you have a stable water supply or have another water storage plan, freezing saltwater would be an excellent way to go.

When ice melts, it takes a lot of heat out of the air to transition from solid to liquid. While ice is still frozen, the heat in your fridge works toward melting the ice. This stops the air temperature from warming, at least until all of the ice has melted. That’s why a block of ice is so good at keeping the surrounding air cool.

Ice made of saltwater melts below freezing, which means that the freezer will stay at a cooler temperature as the ice melts.

As with regular water bottles or bricks, make sure to leave about 10% headspace in the bottle to allow for expansion.

4. Dry Ice

While dry ice can keep your fridge cold during a power outage, it comes with risks. Finding it in a blackout may be the number one issue. I worry more about the carbon dioxide vapors collecting in small spaces without proper ventilation. Other options are safer. Use this method at your own risk.

If you are aware of the risks and safe handling techniques, it may be an option. According to Continental Carbonic, you would need about 3 lbs per square foot of fridge space. Freezers would require much more.

To use, place your dry ice on a tray on the top shelf of your fridge so the cold gases can travel down over your food and keep it cool. Plan to replenish it daily from your supplier. Dry ice is tough to store in your home as it needs to be held at sub-zero temperatures to stay stable.

When opening your fridge, make sure you have lots of windows open for ventilation. Also, keep an eye on small children and pets, as they are a lot closer to the floor where CO2 will collect and displace oxygen.

5. An Inverter, Extension cords, and Your vehicle

This one can be tricky because your vehicle has to be running to power your fridge. This might be an issue for two reasons.

First, you need to be concerned about proper ventilation. If your car is in a garage, you will need to open the garage door a bit.

Second, there are concerns that it could harm your alternator. With that said, it’s pretty normal to see building contractors do this in the wild. I’ve seen this method used with portable table saws and other heavy-duty power tools. I’ve personally had to resort to this a few times to power my fish tank, and though I’ve never run a fridge, it’s never been a problem. Use this method at your own risk.

Third, your inverter must have a large capacity. Just how large?  Capacity needs to exceed the electrical draw your fridge needs to start the compressor. Using too small an inverter might blow its fuses when the electrical demand is too much.

Essentially, you attach an inverter directly to your car’s battery and run an extension cord to your fridge. Your vehicle needs to be running, or else the battery will run out of juice quickly.

The upside? You only need to run your car and inverter until your fridge cools, and then only a few times a day to keep your food cold. That’s assuming you open the fridge door only when necessary.

6. An Inverter and a Deep Cycle Battery Bank

This method has some advantages and disadvantages over using your car and gasoline as a power source.  Using deep cycle batteries will be more expensive than using an inverter with your vehicle. You will need enough battery power to run your fridge for an extended period. You will also need a power source to recharge the battery if it runs down, such as a generator. Theoretically, you could chain together enough batteries to run your fridge for months before needing a charge. The cost and the space to set them up, however, would be ridiculous.

Don’t look to car batteries for this solution. According to MK Battery, deep cycle batteries, such as marine or RV batteries, are designed to deliver a steady source of power for more than 50% of its full charge. Car batteries are different. They are designed to take a big power draw for a few seconds to start your car and then be charged back up immediately by your alternator.

Using a battery bank in tandem with a generator is a more efficient way to protect your fridge contents than using your car as your power source. You will only need to run your generator to charge the batteries while your fridge will run continuously.

After researching my fridge, I found that a single 200ah deep cycle battery should run my Samsung side-by-side refrigerator for about 15 hours before charging is required.  Theoretically.

To see an example of a real-world DIY battery bank and inverter setup, see this detailed set of instructions at instructables.com.

7. Portable Gas-Powered Generators

As long as you have a safe outdoor space to run a gasoline generator, it will power your fridge during a power outage. If you live in an apartment with a balcony, this is an excellent method, as long as you don’t have to haul your fuel up 20 flights of stairs. (I speak from experience on this one.)

Portable gas-powered generators cost money, but maybe not as much as you might think. A generator that can handle a surge of 2200 watts will supply the big energy draw required by domestic fridges when the compressor kicks in. Most modern fridges won’t need that big generator to run them, especially if your fridge has an energy saver setting and was recently running.

I like having a portable generator because I can use it at my unserviced property to power tools and battery chargers. My father-in-law loves his generator for camping. Once you have a generator, you see the value.

A 2000w portable gas generator ranges from $350 to over $1000, depending on the features you want.

8. Portable Battery Generators

Don’t confuse these with UPS backup systems or battery banks that will charge your phone and cordless batteries. These are specialized power stations designed to handle AC appliances and professional tools that require a large amount of power.

Though they are relatively new to the scene, energy storage has come a long way in a short time.

Some all-in-one battery solutions can easily handle the high energy required to start a fridge’s compressor. While they tend to be much more expensive, people like them because they can be recharged in several ways, including solar panels. They also don’t give off any fumes, like gas generators or deep cell batteries.

I looked into the Goal Zero Yeti 1500X and crunched the numbers for my fridge. Using just a fully-charged Yeti 1500X, my fridge (rated at 6.2 amps) would run for about 25 hours before the battery would run out. If I were to charge the Yeti with three of their 100w solar panels every day, I should be able to run my fridge indefinitely.

But how much does a setup like that cost? A Yeti 1500X plus 3x100w solar panels will run about $2600. On the other hand, buying an all-in-one battery solution saves you from buying additional components like solar controllers. They also store very well.

Other options exist, but most of them just as expensive.  I expect that to change because this is a market that’s growing incredibly fast. Using batteries for energy storage is in its infancy.  Battery generators will become less expensive as alternative energy becomes the norm.

9. Buy a Propane-Powered Fridge

Propane-powered fridges are used for multiple reasons, and most revolve around the availability of power. Using a propane-powered fridge is usually reserved for those in rural areas where power isn’t as reliable as it is closer to cities and suburbs. They are also common for off-grid use and for cabins used at certain times of the year.

I’m not talking about the tiny fridges found in RVs and campers. Though these types of fridges have come a long way in the last couple of decades and would work in a pinch, they are smaller than most of us like to have in hour homes.

A handful of American manufacturers produce full-sized fridges and fridge/freezers that run on propane. Some are propane only, while others use propane as a primary power source but include a 110v electric backup system.

Don’t mistake the dual power fridges as something that can be run primarily on electricity. The electrical components are meant for use only as a safeguard for when propane runs out. Many manufacturers state that the electric backup systems are only rated for less than a year of service.

This is probably not the best use of your money or energy to keep a cold fridge with no power. If you are like me, the thought of using propane tanks indoors doesn’t make me very comfortable. Neither does switching tanks out every week. A better solution might be to have a propane fridge converted to natural gas. That still isn’t the best solution for those of us looking to keep our food from spoiling during a potential power outage.

10. Whole House Generator with Automatic Transfer

A whole-house generator works by using your natural gas supply to power your house. It has an automatic transfer switch right at your electrical panel. When it senses a power outage, the generator kicks in, feeding power to circuits predetermined to be essential. You can hook up anything you like, such as your fridge, freezer, lights, HVAC, sump pump, hot water tank, or anything you want to power.

Prices vary widely and can get out of hand quickly. Quotes from professional installers run from a few thousand dollars to way beyond, depending on the size of the generator you want.

Clearly, this is overkill for the average person looking to prepare for a rare blackout. However, suppose you have medical devices that need a constant power source or experience brownouts. In that case, this could be a real solution.

Conclusion

I’ve laid out several methods that you could use separately or together, depending on your needs and budget. Most of these come from personal experience, and others come from a lot of necessary research. I hope the information I’ve collected here helps you through your own preparedness journey.

In 2015, I experienced a 5-day blackout when a fire tore through an underground electrical locker near my apartment building. At the time, I had only lived through rare power outages that lasted a few hours at most.

I was lucky. This blackout only affected a few buildings in our neighborhood, and of those, most were office buildings. I wasn’t competing for resources like I would if the power outage had been city-wide. I was able to test my own methods on my own time. I didn’t have issues with price gouging or scarcity.

Over the 5 days, I tested a few different ways to keep my fridge cold, some of which I included in this article. I settled on a portable gas generator because it was the best way to keep my fridge cold as crews worked day and night to rebuild that entire locker. It made the most sense because no one knew when the work would be done.  I ran it on my balcony, with an electrical cord running through a crack in my patio door.

That event is also what started my wife and me on this journey of self-reliance and emergency preparedness.

Previous
Next

Should Your Bugout Bag Have a Tent or Tarp? Here’s How to Decide

/
Updated:

In a bugout situation, a tent or tarp will give you more comfort and protection than the food that you pack or how you keep hydrated. Finding and creating shelter arguably affects your sanity more than any other basic need. We can go without food for days or weeks. With a select tool or with proper planning, we can attain or carry enough water to last a full 72 hours. But suppose we don’t have a proper sheltering plan. We lose the ability to protect ourselves from the elements. We become unable to keep ourselves healthy and in good spirits. Regardless of your preference, a bugout bag should contain a tent or a tarp as a basic form of shelter.

A tarp is a smarter choice for your bugout bag. A tarp is cheaper than a tent and usually weighs less. A tarp is also more versatile and can be used in various situations that a tent may not be suited for. However, tents are far more comfortable and may make more sense for your situation.  For some, it may be best to pack both a tent and tarp in your bugout bag.

There are valid arguments for using both types of shelter. For short term bugout situations, a tarp is what most seasoned survivalists recommend. Are they right?

Reasons to choose a tent over a tarp for your bugout bag:

Does your bug out plan include family members? Having more than one person to pack for makes packing a lightweight tent a feasible plan. One person can carry the tent and a few additional items, leaving the bulk to be carted by others in your party.  Consider packing extra small tents for storage or privacy for more than two adults.

Can you afford the extra costs? Bugging out is supposed to be something that can be done relatively cheaply, though I’m sure everyone who builds a bugout bag makes a concession or two.

A good tent is worth carrying out with you, as long as it doesn’t weigh more than a few pounds. When it comes to tents, the word ‘cheap’ isn’t widely used, along with the words lightweight or quality. The price of an ultralight tent ranges from a couple hundred to a few thousand dollars.

Could you be bugging out in below-freezing temperatures with snow or high winds? I don’t deny that there are survival methods for shelter building in any weather. But a good 4-season tent will allow you to focus on other aspects of your survival, like foraging for firewood or setting up traps.

Do you have a car/bike or other transportation in your plan? Some might say that planning to leave on foot is the ultimate survival plan. It’s easier to avoid congested highways during evacuations, which makes sense. A less-expensive tent is feasible if your exit plan includes a car or bike. In this situation, I also recommend packing a tarp if leaving on foot is suddenly the only way out.

Are you a creature of comfort? Like the wife, some people would prefer to keep as many creepy crawlies separated from their living accommodations with the barriers that a tent provides. Some don’t worry too much about sharing space with critters, which might make a tarp a better choice, but it’s something to consider.

Bugout Bag Recommendations: Tent

What size of tent for a bug out bag? Planning for one or two people? A small ultralight tent is what you need. The Marmot Tungsten is less than 3 ½ lbs and has a fly that creates two covered outdoor spaces on each side.

I need a tent for at least four people! There aren’t many options out there for lightweight tents that are lightweight, large, and inexpensive, but the Moon Lence 6-person tent seems to find a happy medium. It will sleep four adults reasonably well, weighs in around 11 lbs, and is far less expensive than most lightweight tents I’ve come across. Alternatively, you could pack multiple tents for your group.

Need a winterized tent? The Black Diamond HiLight Tent is a two-person tent made for all seasons and is very popular among high-altitude climbers. It’s remarkably light considering it’s a 4 season tent, coming in at a trail weight of only 2 lbs and 10 oz. The downside is that it would need a little extra camouflage to hide the brilliant blue color.

Why choose a tarp over a tent for your bugout bag:

Tarps make for versatile shelters. Ground shelters can be used to protect you from some weather, but they can also be used as above-ground hammocks.  If you have two tarps, you can use one as a hammock and the other as a topper shelter. Or, create a bed out of less-pointy flora and use one tarp as a mattress cover and the other as your shelter.

Better Utilization of Fire. Help to keep warm and comfortable by appropriately placing a campfire near your tarp structure. It’ll help keep you warm and stays ventilated, unlike a tent. And as long as you’re smart about its placement, it won’t catch fire.

Easy Packing. A tarp is a giant square or rectangle. It’s pretty easy to fold up and store. Some nylon tarps fold up into unbelievably small packets and weigh only a few ounces. Instead of dragging poles out, you can make your own supports using trees, sticks, ropes, and rocks.

And even more versatility. A sturdy tarp can be used as a shelter at night, but it can also be used in many ways to support your survival efforts.

  • Collect rainwater
  • Hide/camouflage stashes
  • Make animal traps
  • create privacy screens for a camp privy or shower
  • build a survival tarp raft
  • Use as a stretcher to pull an injured person
  • Use as a blanket to trap body heat

Tarps are the Inexpensive Choice. Though you can drop a pile of money on a tarp, you don’t have to spend much to get a good one. Remember that new material technologies and manufacturing will price some tarps much higher, but not necessarily at any real benefit. Just remember that nylon tarps are light, but old-school polyester tarps will keep you drier and will likely hold up longer.

Bugout Bag Recommendations: Tarp

What size tarp for a bug out bag? Tarps are pretty universally lightweight but not all the correct size. An 8’ by 10’ tarp is plenty big for one to two people and should weigh no more than a couple of pounds.

What features do I need? At a minimum, your tarp should be waterproof and have a way to tie it down. At the bare minimum, the tarp should have some grommets or ties on each edge, and don’t forget paracord. Don’t forget to practice your knot-tying skills.

A great bare-bones blue poly tarp is available everywhere for less than $20, like this one at Amazon.

For a lighter-weight option, the Noah’s Tarp is a decent choice. It has taped seams, so you don’t need to worry about waterproofing. I like this one because it has little pockets to tuck in your guy lines when packing up. This is my favorite for hammock camping, but it is not cheap. However, it is definitely less expensive than an ultralight tent.

A tarp is still a good idea, even if you choose a tent to shelter in. Maybe even a few tarps. And some paracord.

Choosing a Tent or Tarp: A Final Word

Over the years, I’ve learned that everyone has an opinion on what should be packed in their bugout bag. My recommendations on choosing a tent or tarp are based on the understanding that not everybody can live on the barest of necessities. And if they’re willing to make sacrifices elsewhere, a person shouldn’t have to live under a tarp if they don’t want to.

For beginners, family people, or creatures of comfort, an ultralight tent might be the better option.

If you need to build your bugout bag on the cheap, a tarp is the best place to save money. If you’re new at this, get your tarp and paracord and go sleep outside for a night. Practicing using one is the best way to get comfortable with a tarp shelter.

Whatever opinions you read, you should do you. I personally prefer a tarp, but with a wife and small kids to keep safe, a tent makes more sense at this point in our lives.

The one point most agree on is that shelter is an important part of your emergency preparedness plan. So go forth and prepare.  Give your plan a dry-run and find out where it’s lacking before an emergency situation shows you.

Previous
Next

Freeze Drying Food for Storage: Is It Better than Dehydrating?

/
Updated:
Jars of freeze dried vegetables

I’ve been hooked on freeze-drying for a while now. I’ll give you a fair warning: I haven’t actually purchased a freeze dryer yet. The more I research these machines, the more I am convinced a home freeze dryer, used in conjunction with a vacuum sealer, is the ultimate prepper setup. I see it as an excellent combination for preserving foods and meals I usually freeze into shelf-stable, lightweight sustenance.

Freeze-drying food is better than dehydrating food because freeze-dried food can be rehydrated and used as if it were frozen. Freeze-dried food is also superior for creating food powders for flavoring, stocks, soups, and dehydrated meals.

Now, I won’t be replacing my dehydrator. I will keep using it for drying herbs, fruit leathers, and fruit for my homemade trail mix and granola. I do see myself using a freeze dryer to create and package a bunch of ready-made meals like fajitas and chicken soup, as well as drying and shelving this year’s green bean harvest.

Difference Between Freeze Drying and Dehydrating

Freeze-drying food is not the same as dehydrating food. Both methods will dry food out, creating a shelf-stable version that can be stored for much longer than fresh, but that is where their similarities end.

To dehydrate food, a device is needed that uses heat, air circulation, or a combination of both to dry out food. It can be a stand-alone appliance with stacks of racks, your oven, or even a big fan. Think of dried herbs found in jars or packets at the grocery store, such as oregano, sage, and thyme. These herbs have all been dehydrated commercially in a similar way you would use a dehydrator at home.

Popular foods dehydrated at home include jerky, fruit, vegetables, and herbs. There are many online communities centered on the topic of dehydrating that share tips and methods, like the dehydrating sub over at Reddit.

A freeze dryer works in a completely different manner. Like a dehydrator, it removes moisture from food spread out on trays. Unlike a dehydrator, a freeze dryer flash-freezes to temperatures below -30°F and then uses a vacuum process to vaporize and suck moisture out of the air. This process reliably removes far more moisture from food than dehydrators do, and it does it without cooking it.

Some popular foods to freeze-dry include cooked and raw fruits and vegetables, meats, sauces, baked items, and dairy.

Which is Healthier: Freeze Dried or Dehydrated Food?

If the food you are preserving is healthy, then both methods of food preservation are healthy. The term “Garbage in, garbage out” is relevant here. If you are drying junk food or foods high in added sugar and artificial preservatives, we can’t talk about how healthy it is. And yes, you can dry junky foods with both of these preservation methods.

When talking about natural, whole foods, using a freeze dryer is slightly better when comparing nutrition values. Depending on the tools used, the process of dehydrating can involve heat. Heat can destroy or degrade vitamins and minerals. Methods like sun drying or air drying can cause damage to your food. There is a phase where enough water is in the food to allow natural decay processes to take place. Also, some vitamins are destroyed with exposure to light. A tip is to make sure that the time it takes to dehydrate your food is short enough to minimize these processes and stop your food from spoiling.

Freeze drying, on the other hand, has the advantage of using cold temperatures, which is in itself a form of food preservation. Next, a vacuum pump pulls moisture out of the food while it’s in a frozen state. This method leaves behind the majority of nutrients in the food wholly untouched and is considered healthier overall.

Which tastes better?

While personal tastes will have more influence than anything, it will also depend on what you want to store. There are some foods that some would argue need to be preserved with a dehydrator. Trail mix needs dried fruit, or it isn’t trail mix. Jerky would never get its delightfully chewy texture from a freeze dryer.

Freeze drying is different. Many foods that have been freeze dried can be rehydrated to almost the exact same texture and flavor that they would be if they had only been frozen and thawed. Meats can be freeze-dried raw or cooked and used as you would normally.

I love batch cooking, and I enjoy taking a weekend each month to cook all of my food. The problem is that fridge and freezer space is a premium in my house, especially in the summer when I’m harvesting or buying bulk produce. The solution to my space problem is to batch cook and then dehydrate and pack meals. Spaghetti sauce, mashed potatoes, soups, fully cooked and sliced roasts, and even breakfast scrambles are all quickly dried and stored in the pantry, ready to go at a moment’s notice.

The following video shows how an organic tomato that’s been freeze-dried rehydrates.

Some foods even turn into yummy, healthy, crunchy snacks with no rehydration needed.

Do Freeze-Dried Foods Last Longer Than Dehydrated Foods?

Foods that have been properly freeze-dried have no real-world advantage over dehydrated foods. Both have a long shelf-life. Making sure the preserved food is stored correctly is really the determining factor. Vacuum sealing or keeping food in an air-tight container is the best way to help your food stay dry and safe.  When acceptable, adding a desiccant or oxygen absorber will keep the quality and flavor even longer.

Though it is thought that freeze-dried food will last longer than dehydrated food because it contains less water, that confidence only goes so far. Freeze-dried food will readily soak up a little more moisture from the air it’s exposed to because it’s that much drier to start. This is why freeze-dried foods aren’t considered to have much of an advantage.

Which is Cheaper?

The up-front costs of freeze-drying are far more than dehydrating. Home freeze drying is still a relatively new concept, and home freeze driers are very expensive.

Dehydrated Apple Chips

Dehydrating food at home can be done with no extra equipment. Plans for solar dryers are found in popular homesteading forums. Some people use their oven. I personally find a home dehydrator to be well worth its investment. Dehydrators don’t have to be fancy at all and start at around $40.  Some balk at yet another kitchen gadget, but my dehydrator is used nearly 8 months out of the year. Mine sits on my countertop from late spring to mid-fall, happily whirring away as it dries. When my harvesting is done for the season, it lives on a shelf in the basement.

My personal experience with dehydrators has been a cheap one. A simple dehydrator I bought nearly a decade ago is on sale from time to time for less than $30. It has a temperature dial, screens, fruit leather trays, and regular trays that suit my needs just fine. I won’t upgrade until I’m convinced I need a larger dehydrator. My oven works well as a secondary dehydrator when I need extra room, and at this time, I only dehydrate the fruit I buy in season. I do lots of jerky batches every year, but I do that in my smoker.

Home freeze dryers are a big investment upfront. Home freeze dryers are still pretty rare, and entry models are above $2000. Models with larger capacity and upgraded vacuum pumps can cost much more. Freeze drying at home is an investment, and I would not suggest investing in one unless you are a proven prepper.

I feel that a home freeze dryer will pay for itself if it’s used regularly as part of a food preservation and storage plan. The sheer volume of things you can freeze dry is so much greater than a dehydrator. If you would freeze it, you can freeze dry it. Harvested produce from your garden freeze-dries brilliantly. You can freeze-dry your produce before it turns, and in turn, you can grow more.

All in all, both methods can be considered worthwhile to those who live a self-sufficient and frugal lifestyle.

Previous
Next